DJI Mavic, Air and Mini Drones
Friendly, Helpful & Knowledgeable Community
Join Us Now

Lost antenna cover on DJI Smart Controller

Joined
Feb 9, 2021
Messages
8
Reactions
6
Age
73
Location
Newcastle upon Tyne
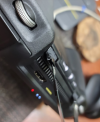
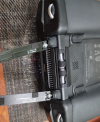
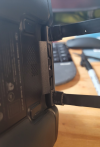
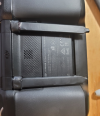
Sorry if this has been asked before, I searched but couldn't find an earlier post. The plastic sleeve like cover is missing on one of the antennas. Does anyone have any idea where or how to get a replacement? I live in the UK but the part is so light I wouldn't image ordering from overseas would be a problem

Thanks in anticipation of some help
 
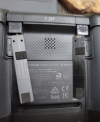
I have the same issue, DJI said I need to send them the remote for repairs. Trying to find something that could be attached to the swivel mechanism and provide rigidity for antennas.

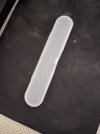
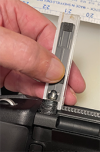
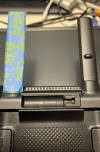
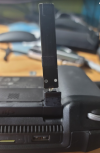
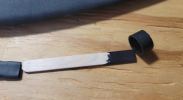
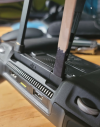
2021-08-04 17_18_12-Photo - Google Photos — Mozilla Firefox.png2021-08-04 17_18_21-Photo - Google Photos — Mozilla Firefox.png2021-08-04 17_18_01-Photo - Google Photos — Mozilla Firefox.png
 
Hi, at least DJI replied to you. They have not shown me that courtesy! So when I come to replace my Mavic Pro2 it won’t be with one of theirs.
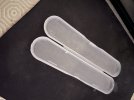
I haven’t tried it yet but I think a cushioned nail file case is a candidate for the the repair A090F7C3-43A5-4506-AD7A-2D0739DD2AD4.jpegCA9A2BC0-0380-4866-9186-1FB9F039836A.jpeg
 
That's a great idea with that file case, it looks like the plastic itself would be hard to bond to the remote control plastic.
 
Actually, your idea pointed in a proper direction.
I think I can shape a pen housing with heat/lighter into a firm case for antenna and then use some shrinktube to make it looks OEM.
The pen should be something in between regular sized and a sharpie sized. I
ll post pics with the experiment.
 
Actually, your idea pointed in a proper direction.
I think I can shape a pen housing with heat/lighter into a firm case for antenna and then use some shrinktube to make it looks OEM.
The pen should be something in between regular sized and a sharpie sized. I
ll post pics with the experiment.
Hi found my case too thick so ordered thin plastic sheet (1mm) from Amazon Amazon.co.uk : 1mm Clear Thin PETG or search 1mm clear thin plastic,
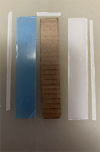
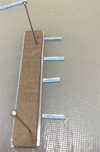
I guess you should be able to get it where you are. 01.png02.png03.png
Pics not in order but I made a cardboard template and cut out 2 pieces then two strips for sides and 1 for top. Trimmed the template so narrower for width of antenna and used this as a guide. The little strips are just to provide a base for the side strips which I made wider to fit more easily as sides. Repeated other side and then glued top sheet. Once assembled, used Stanley knife to trim sides and used sandpaper to shape and smooth. Cut one surface to accommodate where base thickens. Once finished, it was a tight fit on the felt like pads and protects the antenna nicely. I used tape to cover whole thing once attached to make it waterproof. I did not glue it in place since I hope eventually to replace with the proper spare part.04.png
 
Nicely done =)

I couldn't find the right way to form a plastic tube to the shape needed. I only have a propane stove and no heat gun, so you have to be extra careful not to melt/burn the plastic.
Instead, we ate some ice cream, and the shape of the wooden stick reminded my wife of something =) So she came up with this idea.

Items used
  1. Heavy wall, adhesive lined, 1 awg shrink tube with 3:1 shrink ratio.
  2. Ligh wall shrink tube.
  3. Two ice cream sticks.
  4. Lighter
  5. Scissors
  6. Sharpie (optional)
Used heavy duty shrink tube to bond sticks to the hinge and then light shrink tube to secure antennas to the sticks. Looks original as F from 10 feet away =)
Took me 5 min each, have to be careful with lighter not to overheat remote plastic. The heavy-duty shrink tube became very stiff after it cooled down and glue helped a lot.
In the picture one of the antennas is a little bit misaligned, it was the first one I did. Doesn't affect the functionality and the shrink tube fits nicely in the body of the remote.

Hope they will sell parts eventually.

1628896818061.png1628896839730.png1628896858574.png1628896872423.png1628896890401.png
 
Last edited:
Not sure if it's possible for admins to make this sticky or attach to some FAQ so other people can see our solutions, I didn't see anything anywhere on the net.
 
Nicely done =)

I couldn't find the right way to form a plastic tube to the shape needed. I only have a propane stove and no heat gun, so you have to be extra careful not to melt/burn the plastic.
Instead, we ate some ice cream, and the shape of the wooden stick reminded my wife of something =) So she came up with this idea.

Items used
  1. Heavy wall, adhesive lined, 1 awg shrink tube with 3:1 shrink ratio.
  2. Ligh wall shrink tube.
  3. Two ice cream sticks.
  4. Lighter
  5. Scissors
  6. Sharpie (optional)
Used heavy duty shrink tube to bond sticks to the hinge and then light shrink tube to secure antennas to the sticks. Looks original as F from 10 feet away =)
Took me 5 min each, have to be careful with lighter not to overheat remote plastic. The heavy-duty shrink tube became very stiff after it cooled down and glue helped a lot.
In the picture one of the antennas is a little bit misaligned, it was the first one I did. Doesn't affect the functionality and the shrink tube fits nicely in the body of the remote.

Hope they will sell parts eventually.

View attachment 133335View attachment 133336View attachment 133337View attachment 133338View attachment 133339
A brilliant solution, much easier than mine! Still hoping to get a replacement part but won't hold my breath. DJI have totally ignored my email so they needn't hold their breath when it comes to replacing my MavicPro2.
 
Nicely done =)

I couldn't find the right way to form a plastic tube to the shape needed. I only have a propane stove and no heat gun, so you have to be extra careful not to melt/burn the plastic.
Instead, we ate some ice cream, and the shape of the wooden stick reminded my wife of something =) So she came up with this idea.

Items used
  1. Heavy wall, adhesive lined, 1 awg shrink tube with 3:1 shrink ratio.
  2. Ligh wall shrink tube.
  3. Two ice cream sticks.
  4. Lighter
  5. Scissors
  6. Sharpie (optional)
Used heavy duty shrink tube to bond sticks to the hinge and then light shrink tube to secure antennas to the sticks. Looks original as F from 10 feet away =)
Took me 5 min each, have to be careful with lighter not to overheat remote plastic. The heavy-duty shrink tube became very stiff after it cooled down and glue helped a lot.
In the picture one of the antennas is a little bit misaligned, it was the first one I did. Doesn't affect the functionality and the shrink tube fits nicely in the body of the remote.

Hope they will sell parts eventually.

View attachment 133335View attachment 133336View attachment 133337View attachment 133338View attachment 133339
Hi. I really need to make this solution as my sleave broke off today. Could you porivde more detail on how you made it?

This sentence in particular -- more detail:
Used heavy duty shrink tube to bond sticks to the hinge and then light shrink tube to secure antennas to the sticks.

I don't know what you mean by the "h

Nicely done =)

I couldn't find the right way to form a plastic tube to the shape needed. I only have a propane stove and no heat gun, so you have to be extra careful not to melt/burn the plastic.
Instead, we ate some ice cream, and the shape of the wooden stick reminded my wife of something =) So she came up with this idea.

Items used
  1. Heavy wall, adhesive lined, 1 awg shrink tube with 3:1 shrink ratio.
  2. Ligh wall shrink tube.
  3. Two ice cream sticks.
  4. Lighter
  5. Scissors
  6. Sharpie (optional)
Used heavy duty shrink tube to bond sticks to the hinge and then light shrink tube to secure antennas to the sticks. Looks original as F from 10 feet away =)
Took me 5 min each, have to be careful with lighter not to overheat remote plastic. The heavy-duty shrink tube became very stiff after it cooled down and glue helped a lot.
In the picture one of the antennas is a little bit misaligned, it was the first one I did. Doesn't affect the functionality and the shrink tube fits nicely in the body of the remote.

Hope they will sell parts eventually.

View attachment 133335View attachment 133336View attachment 133337View attachment 133338View attachment 133339
Hi. My shell broke off today and I need to do exactly what you did. Can you provide a bit more detail? What step did you do first? Wrapping ice cream sticks around the antenna? Or doing the hinge? When you bonded the sticks to the hinge, was the antenna between the two sticks? Then, you covered the two sticks with the lighter shrink tube? And you used head from lighter to make the tubes shrink?

And it all worked after you were finished? I am very nervous about screwing it up. So I appreciate your patience with me. THank you!
 
Interesting thread, same problem with mine - no reply off DJI about getting a spare cover.

Mine is just splinted to a wooden stick with self amalgamating tape as ive been unable to get a replacement.
 
Lycus Tech Mavic Air 3 Case

DJI Drone Deals

New Threads

Members online

Forum statistics

Threads
131,070
Messages
1,559,524
Members
160,050
Latest member
invertedloser