If you wanted to stitch together a six panel pano shooting straight down, how would you go about doing it? M2P.
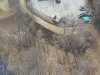
I have a request from a client who wants an aerial shot of a construction site looking straight down onto the property. But because I am in a Class D airspace near the local airport I can only fly to an elevation of 100'. But at one hundred feet I can only get about 1/6 of the project into a single frame. So I was thinking about trying to stitch together six frames but I have no idea of how to go about lining up the drone and over lapping each frame by 30% so that either LR or PS can stitch them together.
Your thoughts?