DJI Mavic, Air and Mini Drones
Friendly, Helpful & Knowledgeable Community
Join Us Now

Making Panoramas without using automatic modes

robwas

Well-Known Member
Joined
Dec 12, 2020
Messages
58
Reactions
23
Age
56
Location
South River, NJ
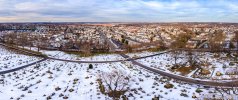
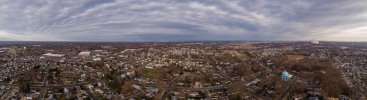
I did a search and I don't think this is being discussed anywhere else. I'm not sure it falls under editing but since what I want to discuss is not dependent on any particular drone but does require the use of software to stitch together photos later I felt this was the most appropriate place. As a fairly experienced photographer but new drone pilot I felt all the automatic modes to shoot "wide" or 180 degree panoramas on my Mini 2 were quite limiting and because those modes are limited to jpeg and can't do HDR I thought I'd try simply shooting a bunch of bracketed frames in RAW mode simply moving the gimbal manually with my controller. My first attempt didn't work out but soon I realized that due to the wide angle lens I just needed to leave plenty of overlap between the images to get a proper stitch in Lightroom. Once I did that, things were dandy. The next thing I did was not just shoot the pano this way but also take 3 frames for each position so it was possible to capture the full dynamic range. In the end what I wound up with was sometimes over 50 images just or the one pano but I think the results were really good, phenomenal detail at 100%, the images were around 18,000 pixels wide (obviously I can't share something that large here). I'm going to share a few I just shot around town, not the best subject on a gray NJ day but I think it adds to the post. So one thing I'm curious about, obviously panoramas mean distortion but with a drone it occured to me you could potentially move the entire drone sideways in some situations to capture a larger view but I really wonder if that would work out or if anyone has tried it? My guess is that because the the drone moved perhaps it may not work out. I haven't tried it yet. Anyways, I am curious if anyone here is doing panos the way I have been doing them and if there's any suggestions on things to make them even better (short of more exciting subject matter) One of the problems I've encountered are cars and things that move between shots.
 

Attachments

  • 132496060_10222654879353833_5038378447497159591_o.jpg
    132496060_10222654879353833_5038378447497159591_o.jpg
    1.3 MB · Views: 35
  • 133547606_10222693846567989_6955622954872191383_o.jpg
    133547606_10222693846567989_6955622954872191383_o.jpg
    1,005.7 KB · Views: 33
  • 131986344_10222654941875396_5699787397307963361_o.jpg
    131986344_10222654941875396_5699787397307963361_o.jpg
    1.1 MB · Views: 33
A lot depends on the software you use. I use PTGUI Pro to stitch, and Photomatix to tone-map, so some of this advice may not be useful to you.

I use a Mavic 2 Pro which lets me shoot in panorama mode but save the individual images to stitch later. I don't know if the Mini 2 can do that, but if it can it's a real time-saver (and also avoids the problem of accidentally missing part of the scene). When shooting manually I try for 50% overlap.

I shoot in manual mode (so white balance and exposure) remain constant, manually adjusting the exposure at 2-stop intervals to cover the full range from ground to sky — usually 3-4 different exposures is required. I find I get better stitching results when I shoot each exposure level as a separate panorama; as well, this is the only option that lets me use the panorama mode on the Mavic.

PTGUI stitches all these together and I export them as separate blend planes — so one panorama at each exposure, but aligned between panoramas as well. For moving objects like I do a fair bit of work in PTGUI masking out the objects so they only appear once (or no times).

Photomatix lets me tone-map as a 360° image, so I don't have an edge line. It also does a reasonable job of handling ghosting — again, frequently I'll manually identify the ghosted areas and preferred exposure.

Fast-moving clouds are the hardest thing to deal with, as it takes a few minutes to completely shoot a spherical panorama multiple times. Usually this means lots of manual work in Affinity Photo to make them look passable. I'll often use Nik Color Efex to further process the image a bit, fixing white balance in shadows, adding a bit of tonal contrast, and so on.

You can see some of my results in the following links:


Thanks for the detailed reply, this was the information I was looking for and the track I'm on.. I actually started shooting 180 panoramas at different exposures, combining them as a pano then later merging all the different exposures into a final HDR image. I'm using Adobe Lightroom and I found if I don't set deghost to high small details get odd outlines and sometimes I'll see houses with double windows that had only one on the actual house. I can see there's a fair deal of work involved in getting a high quality panoramic image without errors, the more I look closely the more I was finding. I'm using the Mavic Air 2 incidentally, I did have a Mini 2 at one point but there were a lot of shortcomings photographically and it had some issues with the gimbal so being inside the return window I was able to exchange it.

One thing my drone does offer in addition to auto shooting panoramas (as your MP 2 does) is the ability to shoot 48 megapixel images however 48 mp mode cannot be combined with any of the panoramic shooting modes so I sometimes I do them manually and they seem to have a bit more details (although not as much as you'd think given 4x the megapixels of the 12 mp mode) I really wish there were a way to have the drone combine 48mp, pano and AEB all with one button press.

Anyways I'm off to go look at your links. Thanks again for all the useful information you've shared.

-Rob
 
Lycus Tech Mavic Air 3 Case

DJI Drone Deals

New Threads

Forum statistics

Threads
131,006
Messages
1,558,800
Members
159,987
Latest member
fbri7