DJI Mavic, Air and Mini Drones
Friendly, Helpful & Knowledgeable Community
Join Us Now

Best way to stitch a panoramic from RAW files.

The big deal about raw is that the image is not preprocessed by the camera software. All the color, dynamic range, bit depth, etc is available to the user. This means that there is a great deal more flexibility for image manipulation and improvements.

A jpeg image, which is the other choice, has all this removed, and has been compressed into a much smaller file. It no longer has the same flexibility or quality. There is no way to get these losses back.

There are no universal magic settings that apply more to a raw flow than a jpeg flow. Various image editing packages make their own adjustments to remove the various image imperfections that are present - spatial distortions particularly. They do universally a better job than the DJI internal raw to jpeg converter.

I have some doubt that all versions of the DJI RAW are actually RAW. On my P3 4K, MA, and P4adv they are all TIFFS which are already partially preprocessed. These have more flexibility than JPEGS but not as much as a true non-debayered RAW.


Agreed. RAW is not some universal standard for unprocessed images, pure and untouched. Every manufacturer and camera has its own version of what they refer to as RAW. The earlier drone cameras were nothing close to RAW and did not take well to color grading. The RAW that comes from my M2P is definitely not the equivalent to my Blackmagic URSA or BMPCC 6k.

I also don’t understand why anyone would shoot only JPG images unless quality is of no concern and you don’t want to bother with color grading. That said, the JPGs out of the M2P look pretty good.
 
Here's an example of why using RAW can improve an otherwise throw-away image. I shot this on Friday (not with my drone) in a rush and got the exposure wrong by quite a few stops. Not fixable with a JPG, but I was able to get a reasonable result by adjusting the RAW file in Photoshop.View attachment 115465

Great example especially given I see frequent claims that you can't see the advantage of the M2P unless printing at huge sizes or a professional but anyone can see the difference here.
 
I shoot both at the same time. That way I have available to me two options. Raw kills it though for dynamic range and color adjustment capability. Just to be clear, I mean I have two card slots on my camera and I can program one to capture the Raw and the other the JPEG images. I mostly use the JPEGs for an onsite viewing with the realtor. They are surprisingly good from the Fuji from a color, contrast and saturation standpoint. I think most pro level cameras have this option now.
 
Last edited:
I have some doubt that all versions of the DJI RAW are actually RAW. On my P3 4K, MA, and P4adv they are all TIFFS which are already partially preprocessed. These have more flexibility than JPEGS but not as much as a true non-debayered RAW.
Interesting observation, which also crossed my mind more than once or twice ... How did you came to such conclusion, if you don't mind to elaborate?

It's entirely possible that DJI developed their own, simplified recipe to cook DNG files and record them efficiently on SD cards. This is clearly visible on panoramic stitches containing badly underexposed images of heavily shadowed parts of the landscape, noticeable with M2P or Inspire's X5S camera. Clearly Adobe Camera Raw isn't able to deal with exposure adjustments at the rate easily accomplished with - say - NEF files supplied by DSLR Nikon cameras ...
 
To get the best possible professional result, when creating a stitch out of the Mavic 2 Pro Hasselblad camera.

Mavic 2 Pro creates a jpg automatically, but I would like to make the best use of the Hasselblad camera by using the RAW files.
I usually shoot with the mode, where the final stitch is put together out of nine shots.

What are your preferences and workflow. Are you doing it in Photoshop, Lightroom or with some other software ?

Still images it is obviously what I am talking about...
When it comes to stitching, PTGui software (not cheap though) delivers the best results, period.

Interestingly, no one here considered the advantages of TIFF format, which is offering almost identical to RAW format post-editing capabilities. Here's my recommended workflow, dealing with M2P 3x3 (optionally 180 deg 7x3 horizontal) panoramic sequences:
1. Shot in Manual, save in DNG. For "golden hours scape" shot 2 or 3 identical sequences with slightly different EV value for each.
2. Batch convert DNG files to uncompressed 8 or 16-bit TIFF in Camera Raw, no adjustments necessary.
3. Load the sequence into PTGui, optionally replace badly over or underexposed rows with better ones from alternative sequences, experiment.
4. Render the stitch into 8 or 16-bit TIFF file.
4. Open the stitch in Photoshop, crop to your liking, open Camera Raw Filter and start editing. This is the most valuable tool for all tweaks, global and partial.

This approach should deliver approx. 160MP file size, good to print 60" wide at 300dpi ...
 
Coming from a DJI/Hasselblad source of course they're going to make such a claim it's what makes the Hasselblad branding successful just as numerous other companies like Leica and Zeiss have found that they can make money on their name with products that have nothing to do with them. The easiest counterpoint to demonstrate that Hasselblad have nothing more than branding on the M2P is to look at the Phantom 4 Pro which despite being very similar to the M2P, has no Hasselblad branding. Beyond that Hasselblad do not have anything to do with cameras smaller than medium format which are about as different as you can get from the 1in sensor in the M2P, most of the smaller sensor cameras they've sold are hideously rebranded Sony's.

The claim it's the 'image processing' is another favourite among the branding companies especially Leica on the rebranded Panasonics because it's not so easy to disprove. I don't believe for a moment Hasselblad had anything to do with it and if they did it's admitting they're not very good at because the processing on the M2P is extremely poor and a long way behind other 1in cameras. The lens is also poor but to be fair that is compromised by the size.

I realise those seem odd criticisms given I am a fan of the M2P but that's for its sensor which is where the camera gets its advantages from and that is most definitely Sony. I find these rebrandings irritating especially since they're usually specialist, expensive camera companies that have nothing to do with even the technology their name has been slapped on, the Hasseblad Sony RX100 and e-mount cameras are a good example of how nothing was done apart from some garish casing (at least some of the Leicasonics look ok) although my favourite is an old Nokia phone with supposedly a Zeiss lens which was a single piece of plastic.

I agree, Hasselblad is known for high end medium format cameras. This 1" sensor is garbage on the Mavic Pro. I own a crop sensor D500 with a smaller sensor. The Mavic images do not stand up to my D500. Disappointed with the image quality. I purchased based on the Hasselblad name. Garbage. My iPhone takes better images.
 
This 1" sensor is garbage on the Mavic Pro. I own a crop sensor D500 with a smaller sensor.
The Mavic images do not stand up to my D500.
Fact Check
Your D500 (dark green) has a significantly larger sensor than the Mavic 2 pro (purple).
I'm guessing that its lenses are also significantly better too.
FKsM0IJJl_0bu6Y7RNvUhm06Vxz39rmkQUj_MzWv6d2mux-xrgcQCNQvHmapD30c_VFRZB1EqGLJ8F6BAHfKcVG1HR3ZXiR1pk18EMX3sfVDv5c0g2H1yuopXKCahHXSc1JG-qG3

Disappointed with the image quality. I purchased based on the Hasselblad name. Garbage. My iPhone takes better images.
Your Mavic 2 pro can go places and get shots that your iPhone or Nikon SLR can't.
Compromise is a big factor in aerial photography.
In small, affordable drones you are going to have to accept lightweight cameras and lenses.
You can get a drone to lift a D850 if that's what you want, but you would have to pay >$20K.

That said, there's no shortage of photographers showing great images caught with the M2 pro.
Here are some examples: DJI Mavic 2 Pro / 500px
If you can't achieve similar, is it your camera or you?
 
Last edited:
  • Like
Reactions: Johnmcl7
Fully agree with the post above, the 1in sensor is massive compared to the other Mavic drones but it's the smallest of the 'big' sensors and there's a noticeable performance difference between a 1in and an APS-C sensor like the Nikon D500 has. Lenses clearly play a big part as well with the M2P lens having to be exceptionally small which will reduce image quality.

As much as I'd like the IQ of an APS-C or FF DSLR on a drone you're looking at vastly more expensive drones that are incomparably bigger and heavier. The portability of the Mavic series is a key feature for me (and I'm sure many others) so while on one hand it's not as good as a larger sensor, it's a big step up from any of the 1/2.3in sensor drones that are a similar size and weight offering much better high iso and dynamic range.
 
If you can't achieve similar, is it your camera or you?
Mavic's 1" sensor can't compete with D500's APS-C sensor indeed, therefore DStanworth's disappointment isn't based on a fair, knowledgeable comparison. Mavic's images will fail in noise department badly when compared, aside other less relevant disadvantages of a small sensor. Yet, the recipe DJI/Hasselblad was able to employ for cooking M2P images is next to a voodoo magic. Personally I wouldn't bother shooting a single frame photo for anything more than Internet share, but panoramic stitches made with M2P may put the mighty Nikon D500 in dust behind ...
 
I get the best results for the PS Merge to Pano by selecting Reposition (not Auto). The others have not worked for me even as it often results in extreme warping of images on each end of the series. I do not check any of the other boxes, as they’d be better applied before or after the Merge. I will use Fill>Content-Aware Fill after the Merge to Pano and merging the layers into a single layer. There is a bit of lens distortion with the M2P, which should be corrected in LR or ACR for each image before the Merge to Pano. Check your horizon line to adjust the lens distortion.

if you want a super large image with more vertical coverage for a cityscape or tall waterfall, you can also capture images in 2 or 3 rows with a vertical grid. One thing to note with panos is that you don’t want to be close to the subject where the lens distortion will affect the merge. Panos are best done at longer focal lengths so it’s more plane than sphere.The merged image will be plenty large enough to crop.
Thank you for your reply. This helps.

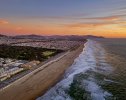
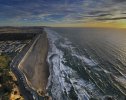
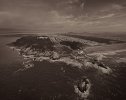
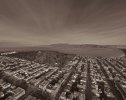
I ve been testing lately and with a little tweaking I am starting to get good results. These example files are 8.000 pixels wide / 300 dpi. In other words; They are big enough to be delivered to an advertising agency for a "real" job ...

I shoot most of my commercial ( non aerial ) photography work with Hasselblad X1D + prime lenses, which gives me a pretty similar resolution. What is amazing is the fact that i can now achieve a similar results (resolution wise) with my Mavic 2 pro, which costs about 5 % my X1D system ( AND IT FLIES )... ; )

Hereś some results of the tests. They were shot in San Francisco earlier this year before the corona virus broke...

Have a great day.
Corrected.jpgSan_Francisco_Aerial3.jpgSan_Francisco_Aerial8.jpgSan_Francisco_Aerial9.jpgphotography work with Hasselblad X1D + prime lenses, which gives me a pretty similar resolution. What is amazing is the fact that i can now achieve a similar results (resolution wise) with my Mavic 2 pro, which costs about 5 % my X1D system ( AND IT FLIES )... ; )

Hereś some results of the tests. They were shot in San Francisco earlier this year before the corona virus broke...

Have a great day.
 
  • Like
Reactions: anotherlab
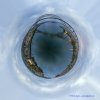
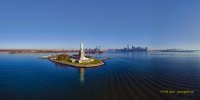
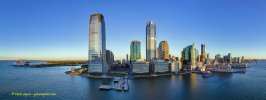
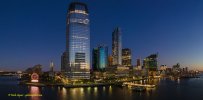
Here is how I do panoramas. I let the drone shoot the panorama in its built-in mode. I make sure that I am saving the raw files from the panorama. I import the panorama files so each panorama has its own folder. If you import with Adobe Bridge, it will remove the files from the folders and then it is a real PIA to match them up. I open all the files from one panorama in Adobe Raw and apply my changes to that one file. I try to pick one of the files that has the most light and dark spots. I then right click on that file and choose "Select All." I then right click on that same file and choose "Sync Settings." Adobe Raw will apply the settings from that file to all of the files. Next I click on the downward arrow at the top right hand side of the screen which is the "Save" button. A dialog box comes up and for the folder, I click on the folder where the files exist and choose to make a new file named "Tiff." I save the files to that folder making sure that I have chosen Tiff files and that they have sequential numbers. This can be done automatically from that screen. After saving the files, I open up PT-GUI. It has a simple and advanced interface. I use the simple one. I click the button labeled "Load Images." I choose all the tiff files that I just saved and then choose "Align Images." The program usually does a great job aligning. Once I am satisfied with the alignment, I choose "Create Panorama" as a Tiff file. I open the Tiff file in Photoshop and make any corrections like sharpening and noise reduction. If I shoot a 360° panorama, I turn it into a tiny planet photo in Photoshop. 10-24_1_bayonne_bridge_pano_5_10-24-2020.jpg10-24_1_bayonne_bridge_tinyplanet_5_10-24-2020.jpgtm1_statue_of_liberty_pano1_11-8-2020.jpg2_colgate_pano_8_9-19-2020.jpg2_colgate_pano_9_9-19-2020.jpgHere are a few examples.
 
Here is how I do panoramas...
Exactly. I've discovered amazing features of Camera Raw Filter when editing TIFF stitch in Photoshop, particularly Graduated and Radial filters to doctor over or underexposed parts and spots of the stitch. With this option you don't have to worry much about any corrections applied to individual DNG files when batch converting to TIFF ...
 
To get the best possible professional result, when creating a stitch out of the Mavic 2 Pro Hasselblad camera.

Mavic 2 Pro creates a jpg automatically, but I would like to make the best use of the Hasselblad camera by using the RAW files.
I usually shoot with the mode, where the final stitch is put together out of nine shots.

What are your preferences and workflow. Are you doing it in Photoshop, Lightroom or with some other software ?

Still images it is obviously what I am talking about...
I use raw with lightroom. last outing some are 20+ stitched doesnt have a problem with over lap
 

Attachments

  • DJI_0420-Pano.jpg
    6.9 MB · Views: 7
  • DJI_0454-Pano.jpg
    5 MB · Views: 8
  • DJI_0471-Pano.jpg
    3.4 MB · Views: 6
  • DJI_0505-Pano.jpg
    2.3 MB · Views: 5
  • DJI_0528-Pano.jpg
    1.3 MB · Views: 5
  • DJI_0545-Pano.jpg
    2.3 MB · Views: 6
  • Like
Reactions: anotherlab
I open all the panorama raw files for each image in Adobe Camera Raw. I make adjustments to one image and then right click on that image and choose "select all." I then right click again on the same image (while all are still selected) and choose "sync settings." It applies the settings from the first image to all others. I then choose "save images" and create a new directory inside the panorama directory and save all as tiff files. I then open the tiffs in PT-GUI and stitch them together.
 
Lycus Tech Mavic Air 3 Case

DJI Drone Deals

New Threads

Forum statistics

Threads
130,599
Messages
1,554,265
Members
159,605
Latest member
petravka