


You are using an out of date browser. It may not display this or other websites correctly.
You should upgrade or use an alternative browser.
You should upgrade or use an alternative browser.
Best way to stitch a panoramic from RAW files.
- Thread starter peikko
- Start date
JimWest
Well-Known Member
Here's an example of why using RAW can improve an otherwise throw-away image. I shot this on Friday (not with my drone) in a rush and got the exposure wrong by quite a few stops. Not fixable with a JPG, but I was able to get a reasonable result by adjusting the RAW file in Photoshop.

Dave Maine
Well-Known Member
- Joined
- Jan 27, 2018
- Messages
- 1,547
- Reactions
- 1,123
- Age
- 82
The big deal about raw is that the image is not preprocessed by the camera software. All the color, dynamic range, bit depth, etc is available to the user. This means that there is a great deal more flexibility for image manipulation and improvements.
A jpeg image, which is the other choice, has all this removed, and has been compressed into a much smaller file. It no longer has the same flexibility or quality. There is no way to get these losses back.
There are no universal magic settings that apply more to a raw flow than a jpeg flow. Various image editing packages make their own adjustments to remove the various image imperfections that are present - spatial distortions particularly. They do universally a better job than the DJI internal raw to jpeg converter.
I have some doubt that all versions of the DJI RAW are actually RAW. On my P3 4K, MA, and P4adv they are all TIFFS which are already partially preprocessed. These have more flexibility than JPEGS but not as much as a true non-debayered RAW.
That's great if you shoot a few stops underexposed, but what's the advantage for people that can get their exposure right?Here's an example of why using RAW can improve an otherwise throw-away image.
Seldenm
Member
The free microsoft ICE stitches raw images into a variety of projections (fisheye, cylindrical, mercator and more) and can output into Photoshop format. I use it all the time. Funny, it actually stitches faster using the RAW images than it does with JPEG.
Dave Maine
Well-Known Member
- Joined
- Jan 27, 2018
- Messages
- 1,547
- Reactions
- 1,123
- Age
- 82
Color, dynamic range are 2. The JPEG file processing reduces the amount of information in the original image by 75 % more or less to reduce file size. The intention is that is imperceptible by the average user. Most pro photographers differ.
macfawlty
Well-Known Member
I don’t use the pano functions in GO4. Easy enough to do it manually with a 2/3 overlap, AEB series. I’ve done many hundreds of panos with a LR to PS to LR round trip workflow. I never shoot JPG along with the RAW. It just clutters up my directories with files I’ll never use.
Some folks here use Adobe Camera Raw, which is essentially the same controls as LR, but LR was designed for managing large batches of images. I’ll shoot each pano several times, slightly different compositions. It’s invariably a lot of images. ACR is not an efficient workflow although recent versions may have adopted some of the LR file management features.
In LR, I select the best exposed image of the bracket to edit and sync settings for each of the images in the pano series. Select all of the images in the pano > Edit In > Merge to Pano in PS. I almost always select Reposition, which yields the best merged image. In PS, I merge layers, clean up any anomalies with the rubber stamp, content aware fill sky where it needs fill and round trip back to LR for cropping and export.
macfawlty
Well-Known Member
Well, here’s the skinny on the Hasselblad. I think there’s a lot to it. I find the the images AND the video take color grading a lot better than my MA2.I mostly just use Photoshop these days too, though I have PTGui for things it doesn't handled well (especially with empty sky panels). Another option is Microsoft ICE, which is free.
Btw: I think it's just the lens that has the Hasselblad label, not the camera. And the lens probably isn't really Hasselblad either (they're just licensing out the name).
Chris
Hasselblad Natural Colour Solution
- Joined
- Jan 11, 2019
- Messages
- 25
- Reactions
- 8
For those people the advantage is better resolution and better dynamics.That's great if you shoot a few stops underexposed, but what's the advantage for people that can get their exposure right?
It is easier to explain this way; If you shoot Black and White, you have more tones of grey ( between maximum black and blown out white )and the tones are smoother.
I hope this helps you to understand the RAW versus JPG (compressed) files.
That was not the point of my original posting that started this thread.
I am still curious about getting an answer to my question;
Looks like most people are doing it in Photoshop or Lightroom...
Some people stated they are using a PC software - I am on Mac. ( forgot to mention that ... )
Here we go again;
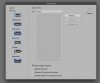
What are the best settings to use in Photoshop ??? ( Please see the jpg attached ) ;
Layout
Vignette Removal
Geometric Distortion Correction
Content Aware Fill Transparent Areas
My aim is to achieve natural looking results with as little distortion as possible.
To make a long story short:
The resolution of the camera is not good enough for me and I need to grow the resolution by stitching several images together.
( I am on Mac )
Thank you very much for all the replies ! I appreciate it
Attachments
- Joined
- Jan 11, 2019
- Messages
- 25
- Reactions
- 8
Thank you very much.It's interesting .. which is why I already put that in post #6.
Could someone answer my question, please ? ; )
Your resolution is going to be exactly the same whether you shoot in raw or jpg.For those people the advantage is better resolution and better dynamics.
- Joined
- Jan 11, 2019
- Messages
- 25
- Reactions
- 8
Not entirely true;Your resolution is going to be exactly the same whether you shoot in raw or jpg.
When you shoot RAW you have access to sharpening and noise algorithms in a program like Lightroom that are way more powerful than those found in your camera.


Here are two shots which are both stitches of 9 images with a resolution of around 8000 pixels shot with Mavic 2 Pro.
It is entirely true.Not entirely true
Are you sure you understand what resolution is?
Yes, you can stitch a composite image that's larger than the camera's native resolution.
But you can do that whether you shoot raw or jpg.
- Joined
- Jan 11, 2019
- Messages
- 25
- Reactions
- 8
It is entirely true.
Are you sure you understand what resolution is?
Yes I am sure.I have been shooting professionally for +25 years.
You right in the number of pixels.
I just do not find it very interesting or meaningful to talk about the difference of a compressed JPG file and a RAW file, since anyone interested can google it easily.
That was not the point of this thread...
Here is a pretty compact explanation in understandable language for those interested in JPG versus RAW;
The most important thing to realise is
that inside your camera, all photos basically start life as raw files, even in a compact camera. A raw file is simply the raw, unedited data collected by the camera's sensor. It's not really even an image file yet – just a matrix of numbers. Different brands and models save this info differently, and it needs to be decoded (using software such as Photoshop, Lightroom etc) before you can even visualise it. A photographer would then carefully adjust things like colours, brightness, sharpness, noise-reduction etc to enhance the image. From this edited raw file, the photographer would then create and save an image file (usually a .jpg, but sometimes a .tiff for super quality) which can finally then be printed or shared online.
If you've set your camera to save your photos as jpg's
, then your camera does all that decoding and adjusting for you, creating ready-to-use image files which (if set to the highest size and quality) can be perfectly good enough for most end uses - even selling to a magazine. The jpg has exactly the same resolution (number of pixels) as the raw file. Its automated adjustments (partly based on your selected 'picture style' and 'white balance' but also includes adjustments to brightness, sharpness, blacks, noise-reduction etc) save you having to manually decode and tweak each image yourself, and the results often look great!
The thing is, with a raw file
, you have the ability to get quite a lot more from your images – but only if you're prepared to work for it. Things like pulling back detail otherwise lost in the blown-out highlights in the sky, lifting out details from dark shadows, correcting exposure, getting the colours right, and simply doing a better job at precisely controlling the amount of sharpness, or noise reduction etc that each image actually needs are all possible, resulting in a higher quality photo. Yes you can tweak and adjust a jpg file too, but not to the same extent. Later on in this tutorial I'll show you just how much you can pull out of a raw file!
Yes, you can stitch a composite image that's larger than the camera's native resolution.
But you can do that whether you shoot raw or jpg.
I am fully aware of it.
Tell me why on earth would I shoot JPG if RAW is available ?
Could someone shed some light on preferences and software used, when stitching nine RAW files created with Mavic 2 Pro please ?
( I am on Mac )
Kind Regards,
ANTTI VIITALA PHOTOGRAPHY
[email protected]
BIRD ON A WIRE - Creative Management & Bespoke Production Partner
Creative Productions representing Photographers, Stylists, Hair & Make-up Artistes, Videographers, Content-makers and Directors in Cape Town, South Africa.www.birdonawire.co.za
Mobile Africa +27767131248
Mobile Europe +358500500087
Skype; peikkokki
Then why would you tell me I wasn't correct saying: Your resolution is going to be exactly the same whether you shoot in raw or jpg.Are you sure you understand what resolution is?
Yes I am sure.I have been shooting professionally for +25 years.
I'm wrong .. I'm correct .. which is it ??You right in the number of pixels.
I agree, there's no need to define raw and jpg images, I don't know why you did.I just do not find it very interesting or meaningful to talk about the difference of a compressed JPG file and a RAW file, since anyone interested can google it easily.
I wouldn't presume to tell you what to shoot or how to do it.Tell me why on earth would I shoot JPG if RAW is available ?
For my photography, I shoot jpg because I get great results that way and don't see any need to use raw.
- Joined
- Jan 11, 2019
- Messages
- 25
- Reactions
- 8
Then why would you tell me I wasn't correct saying: Your resolution is going to be exactly the same whether you shoot in raw or jpg.
I'm wrong .. I'm correct .. which is it ??
I agree, there's no need to define raw and jpg images, I don't know why you did.
I wouldn't presume to tell you what to shoot or how to do it.
For my photography, I shoot jpg because I get great results that way and don't see any need to use raw.
Have a great day.
You sound like a nice guy ... ; )
I am ... but trying to make sense of your posts is extremely confusingHave a great day.
You sound like a nice guy ... ; )
Johnmcl7
Well-Known Member
That's great if you shoot a few stops underexposed, but what's the advantage for people that can get their exposure right?
Even with exposure bang on you can have areas of the image that are overexposed and some that are underexposed especially with the type of landscape shot a drone is likely to take with bright skies and dark grounds. Being able to pull back a couple of stops in those areas as the user has shown is a huge advantage.
macfawlty
Well-Known Member
I get the best results for the PS Merge to Pano by selecting Reposition (not Auto). The others have not worked for me even as it often results in extreme warping of images on each end of the series. I do not check any of the other boxes, as they’d be better applied before or after the Merge. I will use Fill>Content-Aware Fill after the Merge to Pano and merging the layers into a single layer. There is a bit of lens distortion with the M2P, which should be corrected in LR or ACR for each image before the Merge to Pano. Check your horizon line to adjust the lens distortion.For those people the advantage is better resolution and better dynamics.
It is easier to explain this way; If you shoot Black and White, you have more tones of grey ( between maximum black and blown out white )and the tones are smoother.
I hope this helps you to understand the RAW versus JPG (compressed) files.
That was not the point of my original posting that started this thread.
I am still curious about getting an answer to my question;
Looks like most people are doing it in Photoshop or Lightroom...
Some people stated they are using a PC software - I am on Mac. ( forgot to mention that ... )
Here we go again;
What are the best settings to use in Photoshop ??? ( Please see the jpg attached ) ;
Layout
Vignette Removal
Geometric Distortion Correction
Content Aware Fill Transparent Areas
My aim is to achieve natural looking results with as little distortion as possible.
To make a long story short:
The resolution of the camera is not good enough for me and I need to grow the resolution by stitching several images together.
( I am on Mac )
Thank you very much for all the replies ! I appreciate it
if you want a super large image with more vertical coverage for a cityscape or tall waterfall, you can also capture images in 2 or 3 rows with a vertical grid. One thing to note with panos is that you don’t want to be close to the subject where the lens distortion will affect the merge. Panos are best done at longer focal lengths so it’s more plane than sphere.The merged image will be plenty large enough to crop.
macfawlty
Well-Known Member
Good point. The larger sensors are amazing at lifting shadows and gamma, but nowhere near as good at recovering highlights. If you use AEB, you could theoretically mask the sky in from the darker image in the bracket, but with a pano series, you’re not likely to get the same merge results from merging normal and dark series separately. That would require you to edit the two bracketed images, Open as Layers in PS>Auto-Align Layers, then do your masking, export the image, repeat for each of the pairs in your pano, then do your normal Merge to Pano. I’ve never found that to be necessary as a gradient on the sky or ground plane typically is enough.Even with exposure bang on you can have areas of the image that are overexposed and some that are underexposed especially with the type of landscape shot a drone is likely to take with bright skies and dark grounds. Being able to pull back a couple of stops in those areas as the user has shown is a huge advantage.
Similar threads
- Replies
- 36
- Views
- 6K
- Replies
- 9
- Views
- 3K
- Replies
- 1
- Views
- 849
- Replies
- 6
- Views
- 1K
- Replies
- 4
- Views
- 963


DJI Drone Deals
Forum statistics
