DJI Mavic, Air and Mini Drones
Friendly, Helpful & Knowledgeable Community
Join Us Now

HELP! Mini 2 moving on its own!

Are you serious ? Genuine question.
I must admit that I have found it useful to at least 'wet' the tip with solder to aid the conduction of heat to the work piece ....... or am I doing something wrong?
No you are correct I myself Dip my tip in the solder "Tinning" for better heat transfer But some will try and melt a bunch of solder to the tip and then try and glob it to the pad. or place the tip on the pad and then the solder on the tip. This will oxidize the solder way to fast and If you are lucky enough to get the solder to stick it wont be much of a joint.
"tin" the tip of the iron with a little solder and place that on the pad then place your solder away from the tip on the pad and let the solder melt to the tip. In this way the entire pad will be heated for better results and your solder wont have time to oxidize.
I always tell people to keep the iron at 350 until you get this down Because you can easily "lift" a pad if you overheat it.
 
Last edited:
  • Like
Reactions: KJ-Mini2
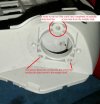
Photo attached, basically the rear arm's pivot is clamped to the middle shell by three screws with additional location provided by the two pimples that you can see. My concern is that the crack extends towards the top of the drone and may have weakend the bottom screw hole.

With regards to working on the drone .... if you decide to .... just take your time and don't let the prying tools go deeply inside the drone, there are thin ribbon cables that you might be able to tear with a prying tool that went to deep plus delicate connectors.
A hair dryer may also be useful to soften glue especially when trying to peel the 3? leg cable that goes to the gimbal and a sensor on the left? hand side.
Heating the top cover of the drone and the side walls might also be useful when trying to open the top of the drone as it will probably soften the pastic a bit and reduce the likely hood of breaking the catches ( easily done with at least some of them ).

I have a video that shows the damage in more detail, you can probably see it better there. (This was it on the day of the crack)


It's a Google drive link.
 
Thanks for the video. YEP There's the problem you need to replace all the cracked plastic parts with new and your drone will fly like new! Not sure why it would just go completely crazy in the air as you describe but stranger things have happened.
I would not fly the drone any longer it could end up crashing.
 
Last edited:
  • Like
Reactions: KJ-Mini2
Thanks for the video. YEP There's the problem you need to replace all the cracked plastic parts with new and your drone will fly like new! Not sure why it would just go completely crazy in the air as you describe but stranger things have happened.
I would not fly the drone any longer it could end up crashing.

Thanks for this advice, so I assume you think it's still possible that the movement could be caused by that even though it's solid now?
 
  • Like
Reactions: Cafguy
ebay Germany/EU would be my first bet.
I can probably dig out the names of two English guys that I trust but you/they might have to deal with customs and I haven't looked to see if they will post to the EU.
 
  • Like
Reactions: KJ-Mini2
Thanks for this advice, so I assume you think it's still possible that the movement could be caused by that even though it's solid now?
Could be -Its kind of like having a wobbly tire on your car...Sort of. The drones pid has to over work the three other motors to keep the drone from pulling in the broken arms "new thrustlines" direction. it only needs to be off by a hair or so. It can be very subtle or not.
If the drone is having trouble in hover and is having to try to hold a stable hover or just wont- It will cause undue wear on the other 3 motors that are running at a faster rpm now. you may even get a stable hover out of glueing the arm together BUT you are making your drone work harder because it is not precise. Your drone just may fly but it will fly hot have shorter battery times and the motors will wear out much faster.
This is the perfect fix to learn to repair with: Its straight forward and there is little chance of completely destroying an expensive part like a gimbal or main board. I say Fix it yourself - follow Yorkshires advice and make sure you get the right parts AND any bushings or stuff that goes with those parts and a good soldering iron and a few practice boards.
In no time you will be flying again Much wiser and more confident with your new found ability!
One more note To desolder get the Braid NOT the plunger do hicky that hardly ever works lol.
 
Last edited:
Could be -Its kind of like having a wobbly tire on your car...Sort of. The drones pid has to over work the three other motors to keep the drone from pulling in the broken arms "new thrustlines" direction. it only needs to be off by a hair or so. It can be very subtle or not.
If the drone is having trouble in hover and is having to try to hold a stable hover or just wont- It will cause undue wear on the other 3 motors that are running at a faster rpm now. you may even get a stable hover out of glueing the arm together BUT you are making your drone work harder because it is not precise. Your drone just may fly but it will fly hot have shorter battery times and the motors will wear out much faster.
This is the perfect fix to learn to repair with: Its straight forward and there is little chance of completely destroying an expensive part like a gimbal or main board. I say Fix it yourself - follow Yorkshires advice and make sure you get the right part AND any bushings or stuff that goes with those parts and a good soldering iron and a few practice boards.
In no time you will be flying again Much wiser and more confident with your new found ability!
One more note To desolder get the Braid NOT the plunger do hicky that hardly ever works lol.

Yeah it just surprises me because it was always perfect even with the glue until it wasn't if I can say that, which was two flights ago.
 
  • Haha
Reactions: Cafguy
Thanks for the advice, I just find it strange that somehow it seemed to work just fine for the past month where that crack was there. Any thoughts about that?

There is no such thing as a "stable" glue repair to a load member. Whatever glue you used it has different compression and tensile properties than the original injection-moulded plastic, and will change the flexing response that close to the root of the arm.

With repeated loading, how that glue joint responds in flexing will evolve.

The only safe place to use glue for a repair is entirely cosmetic areas of the drone, like a crack in the top of the shell.
 
  • Like
Reactions: KJ-Mini2
Heat the pad and let the pad melt the solder!
Well, I can only say I was taught the exact opposite while in college getting my EECS, with a very strong admonishment to heat the pad as little as necessary to create a good solder joint. Otherwise, the pad can become detached from the underlying fiberglass. I have experienced this... Anyone else?

Best practices soldering that I learned involved flux paste as the most important part of the process. Flux the wire end and the pad, put a little solder on the tinned (and maintained!!) iron tip, touch the wire to the solder and flow some on/into the wire, touch wire to pad an then just the molten solder to the wire and pad. Very quickly it all flows together very nicely, minimal heat exposure, nice solid perfectly flowed solder joint.

Do not use rosin core solder. It's a poor substitute for real paste flux, and you can't coat the pad. Also, get a good soldering iron where you can control the temp accurately.

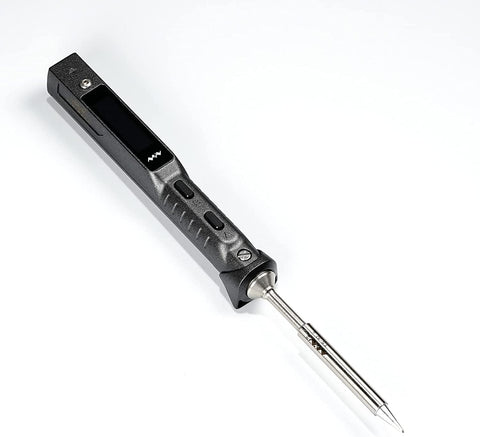
I do A LOT of soldering. Retired, but electronics hobbyist (design and build custom powerbanks for one type of project, 3D print housing, custom electronics). I have one of these, and I love love LOVE it!!

TS101 65W Smart Soldering Iron with TS-B2 Tip & USB Type C Cable, DC+PD Power Input

51mKTPKQWRL._AC_SL1500_large.jpg
 
  • Like
Reactions: Cafguy and KJ-Mini2
But some will try and melt a bunch of solder to the tip and then try and glob it to the pad. or place the tip on the pad and then the solder on the tip.

The single most common mistake made soldering is using too much solder on the solder joint. These are some sure ways to make that mistake 😁
 
  • Like
Reactions: Cafguy and KJ-Mini2
Well, I can only say I was taught the exact opposite while in college getting my EECS, with a very strong admonishment to heat the pad as little as necessary to create a good solder joint. Otherwise, the pad can become detached from the underlying fiberglass. I have experienced this... Anyone else?

Best practices soldering that I learned involved flux paste as the most important part of the process. Flux the wire end and the pad, put a little solder on the tinned (and maintained!!) iron tip, touch the wire to the solder and flow some on/into the wire, touch wire to pad an then just the molten solder to the wire and pad. Very quickly it all flows together very nicely, minimal heat exposure, nice solid perfectly flowed solder joint.

Do not use rosin core solder. It's a poor substitute for real paste flux, and you can't coat the pad. Also, get a good soldering iron where you can control the temp accurately.

I do A LOT of soldering. Retired, but electronics hobbyist (design and build custom powerbanks for one type of project, 3D print housing, custom electronics). I have one of these, and I love love LOVE it!!

TS101 65W Smart Soldering Iron with TS-B2 Tip & USB Type C Cable, DC+PD Power Input

51mKTPKQWRL._AC_SL1500_large.jpg
You have to be careful too much heat will lift the pad. Thats the Best soldering iron for drones! IMO
 
Last edited:
There is no such thing as a "stable" glue repair to a load member. Whatever glue you used it has different compression and tensile properties than the original injection-moulded plastic, and will change the flexing response that close to the root of the arm.

With repeated loading, how that glue joint responds in flexing will evolve.

The only safe place to use glue for a repair is entirely cosmetic areas of the drone, like a crack in the top of the shell.
Got it, thanks.
 
Well, I can only say I was taught the exact opposite while in college getting my EECS, with a very strong admonishment to heat the pad as little as necessary to create a good solder joint. Otherwise, the pad can become detached from the underlying fiberglass. I have experienced this... Anyone else?

Best practices soldering that I learned involved flux paste as the most important part of the process. Flux the wire end and the pad, put a little solder on the tinned (and maintained!!) iron tip, touch the wire to the solder and flow some on/into the wire, touch wire to pad an then just the molten solder to the wire and pad. Very quickly it all flows together very nicely, minimal heat exposure, nice solid perfectly flowed solder joint.

Do not use rosin core solder. It's a poor substitute for real paste flux, and you can't coat the pad. Also, get a good soldering iron where you can control the temp accurately.

I do A LOT of soldering. Retired, but electronics hobbyist (design and build custom powerbanks for one type of project, 3D print housing, custom electronics). I have one of these, and I love love LOVE it!!

TS101 65W Smart Soldering Iron with TS-B2 Tip & USB Type C Cable, DC+PD Power Input

51mKTPKQWRL._AC_SL1500_large.jpg
Thanks for the advice!
 

DJI Drone Deals

New Threads

Forum statistics

Threads
134,730
Messages
1,598,006
Members
163,231
Latest member
hawau
Want to Remove this Ad? Simply login or create a free account