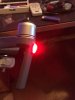
Hi all, my name is Jon, I just wanted to say that I am the person who made the video on replacing the two front legs, and I thought it would be beneficial to provide an update after the repair, I have been getting a lot of traffic to the video and assumed this forum may be the reason why.... in answer to wether I tested the LED, no I didn’t, while it was “broken” I turned It on, the LED’s performed as they should, I turned it off, repaired it, and then turned it back on and they worked the same, so assumed all was good.
thunderdrones is obviously a mountain of information and knowledge, and I read many of his posts and information before even tackling my repair, so obviously take his warnings seriously, and I will confirm I am not a repair specialist and this is not my field of expertise, but I have repaired many phones, iPads and other technology in the past so felt confident enough to do this.
I wanted to address the points he made...
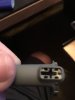
using the small screw driver to pop those wires didn’t nic anything, the wires are abit more robust than people think, go easy and you’ll be fine.
I used almost no pressure at all the when using the pliers, and in all fairness I’m sure I could have used a pair of tweezers instead, but he is right, pliers should probably be avoided.
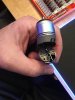
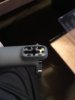
I replaced both front landing legs, and made the holes in the same place on both sides for the LED’s, and had no problems at all with the LED sitting back down flush, exactly where is was originally positioned, and the cover clipped back into place perfectly fine.
Moving the wires to make manovering the leds through the hole caused me no issues at all, if your gentle and don’t approach it like a bull in a china shop then you shouldn’t have any issues snapping wires.
And finally the hot glue I used was all I had, I figured securing the pieces again was more important than the stuff I used to secure them, I used a tiny tiny amount simply to secure the antenna and wires back into place as they were originally.
Since the repair, I have flow the drone around 30 times and have had no issues what so ever, so I can confirm that my repair was not only successful but I would say simple enough for almost anyone to carry out with abit of care, this is not intended by any way to replace having your drone fixed by a professional, but not everyone can afford to do so and some people like to do it them selfs, and this is a method i made to do so.
I hope it’s helped a few people. [emoji1303][emoji1303]


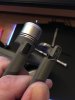

 . The two arms Ive taken apart had a few spots of that black glue holding the antenna in place at the top of the leg and the wires. I used the tips of my tweezers to remove that before removing the antenna. My bigest fear was breaking the LED wires when fishing it through the new larger hole...as I did not want to replace my LEDs.