DJI Mavic, Air and Mini Drones
Friendly, Helpful & Knowledgeable Community
Join Us Now

Render issues in Davinci resolve - Export video colors are different from RAW footage - Some shots are pixelated

Briek

Member
Joined
May 3, 2021
Messages
7
Reactions
0
Age
31
Location
Belgium
Hi,

I've recently bought my first DJI drone, the MA2. After doing some field tests I started a project in Davinci resolve to edit the footage.
After exporting I noticed that some shots look pixelated and that the overal color of the video is different from the color of the RAW footage (deeper shadows, more contrast, darker, etc...). I let Davinci automatically change the project settings upon importing footage. After searching for solutions I realised that some of the shots were captured with a different frame rate because of using the quick shots function. I opened a new timeline for the shots with different frame rates, when I exported a video with just those shots from that new timeline the pixelation was gone. But when I added the footage from the original timeline and from the new timeline into a final timeline set to the right frame rate in the project and render settings (25fps), the pixelation was back again.

Am I doing something wrong in the merging of 2 timelines into one video?
How can I get the colors in the export video to match with the RAW footage? I didn't do any color grading...
I've been searching for a solution for over a week and it is driving me nuts.

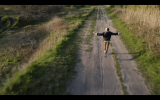
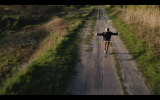
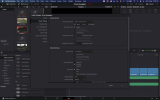
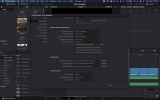
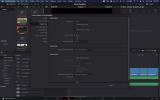
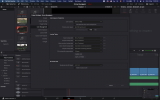
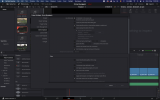
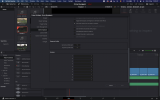
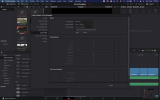
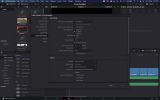
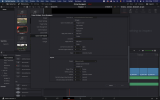
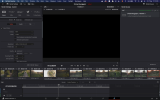
Below some stills for comparing RAW (1st) and exported footage (2nd) (I couldn't upload the video's for some reason) and some screenshots of my project settings.
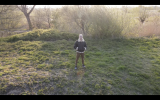
Raw.pngEdit.pngRaw 2.pngedit 2.pngRaw 4.pngEdit 3.pngRaw 5.jpgEdit 4.pngRaw 3.pngEdit 5.pngScreenshot 2021-05-03 at 13.09.15.pngScreenshot 2021-05-03 at 13.09.21.pngScreenshot 2021-05-03 at 13.09.29.pngScreenshot 2021-05-03 at 13.09.33.pngScreenshot 2021-05-03 at 13.09.39.pngScreenshot 2021-05-03 at 13.09.47.pngScreenshot 2021-05-03 at 13.09.53.pngScreenshot 2021-05-03 at 13.10.00.pngScreenshot 2021-05-03 at 13.10.07.png
 
Not a Air 2 owner myself, but I know a bit about video. If you're actually working with video recorded in a RAW format, then Resolve will have to decode it, and then discard some of the color data before it can encode into a usable video file. The whole point of RAW is to collect as much color data as possible so that you can sort through it in post and have more control over what color data the computer keeps in the final file and what it discards, so the color will have to change at least slightly from what's captured in camera (though I don't think the Air 2 has the capability to record RAW video, so I doubt that's actually your problem).

Have you checked to make sure your clips are all the same resolution? You have the "mismatched resolution files" set to "scale entire image to fit," so if you have some clips that are smaller than the one you used to originally create the timeline, then Resolve will stretch them to fill in that extra space, which will make the pixels on those clips more visible. It also looks like you might have some compression artifacting in your edited images, so if your clips are all the same resolution it might just be that. What export settings are you using?

As for the frame rate issue, if you're combining clips of two different frame rates you're gonna get some wonky stuff because the computer has to either repeat or drop frames to make the clips match (though I usually don't find this super noticeable, and it shouldn't cause anything to be pixelated). One solution is to change the frame rate of the original clips to match each other before editing them into the same timeline (I believe it's under clip settings if you right-click each clip in the Media panel, though that might be wrong...I generally don't edit in Resolve and only really use it for color, but I know there's a way to adjust decode frame rate), just be aware that any clips with changed frame rates will play back at a different speed than recorded.

I hope you get it figured out!
 
  • Like
Reactions: Briek
Hi Jamie, thank you for your reply and your time.

So I tried a bunch of stuff. To get the same color and brightness in the exported video as in the RAW footage/original clips, I set the datalevels from auto to full in the project settings, clip attributes, timeline settings and export settings. Didn't do the trick. The metadata of the MA2 says it shoots in 8 bit, so I changed that in the settings as well. Didn't do anything. I tried changing the color space and color science. I exported in different resolutions. Nothing. But then I read something online about Quicktime not being a reliable video player so I checked the exported video in VLC and lo and behold, the colors and brightness were very similar to that of the timeline. So I checked some other exported videos from earlier Davinci projects in Quicktime, compared them with the timelines in Davinci and they were all darker in the export. The funny thing is that the RAW footage/original clips play just fine in Quicktime. Only when they get exported through Davinci they get darker. So I did a quick test in Adobe Premiere Pro to see if the same problem would occur... but it didn't. The RAW footage/original clip, the timeline video in Adobe PP, and the exported video in Quicktime look almost exactly the same! When comparing the exported video in Quicktime and VLC, Quicktime still has a bit more contrast but isn't darker anymore. The image also looks crisper in Quicktime, anyway there's much less difference between both media players when exporting through PP in comparison to Davinci. Why is this happening, why does it get darker when exporting with Davinci but not with PP?

I couldn't find a way to merge the 2 timelines (25 fps and 30 fps) in one video in Davinci. I tried exporting them with the same settings and the same output name/location, encoding at the same time, but that just left me with either one of the timelines exported. Sidenote: I couldn't change the 30 fps timeline to 25 fps in the export.
I tried copying both timelines into a final timeline and exporting that with 25 fps, but that gave me the same pixelated result in the 30 fps shots. I tried changing the mismatched resolution files to something other than "scale entire image to fit" but that didn't do anything. Is there even a way to merge multiple timeline with different frame rates into one exported video with good results? I read online you could, but following all the steps doesn't give me the desired result. My export settings are in the screenshots below (also tried 1920x1080, same results). In the end I just changed the frame rate of the individual clips from 30 fps to 25 fps. It made the clip speed slower with 16,6 percent but at least the pixelation was gone. So now I just need to find a way how to export videos in Davinci without them getting darker when being played in Quicktime and I can be a happy man.


Screenshot 2021-05-07 at 12.13.20.pngScreenshot 2021-05-07 at 12.13.28.pngScreenshot 2021-05-07 at 12.13.36.png
 
What export settings did you use in PPro? From your screenshots it looks like you're exporting a 4k H.264 mp4 from Resolve. Are you exporting the same format form Premiere?

I have no clue what's happening with the frame rate. Different frame rates shouldn't cause your video to become pixelated (you might have some stuttering effect on playback, but it shouldn't have any bearing on the resolution). My guess is there's something else happening, but it's really hard to tell just from the screenshots without seeing the video itself. Are you willing to share your original video files? If so, I'd be happy to pop them into Resolve and see if I can replicate your issue on my end.
 
  • Like
Reactions: Briek and ckoerner
Hi Jamie,

Wow, yeah if you're willing to do so, I'd gladly send some of the original files over.
I exported with the same settings in PPro. I have to add that the clips with different frame rates are also shot in lower resolutions, maybe that wasn't clear from my previous messages. I'll send you a link with the files through a DM.
Thank you for sharing your time with me and helping me out.

Cheers
 
I think I figured it out! It seems this issue is specific to the way Resolve encodes gamma info and the way Quicktime reads gamma settings, which is why you weren't getting the same issue coming from Premiere or during playback in VLC.

Try going to Project Settings, and under Color Management and change the Timeline color space from Rec709 Gamma 2.4 to Rec709-A. Then when you export, under Advanced Settings, set the Gamma Tag to Rec709-A.

As far as the pixelation is concerned, it looks like your project settings are set to 4k resolution, which means your smaller clips are going to be scaled up to match, even if you end up exporting to 1080p. Try making a new timeline (ctrl N on PC, I'm assuming the equivalent is cmd N on Mac), uncheck the Use Project Settings box, and under the Format tab turn the resolution down to 1920x1080 (you can also change the timeline framerate here if you're aiming to export at a certain rate). Then when you export, make sure the resolution is set to match (1920x1080).

I'm on PC, so I'm stuck using an older version of Quicktime. There are enough variables in play here that I really have no way of knowing for sure if these fixes will work for you, but they seemed to resolve the issues for me. Let me know how it turns out!
 
Hi Jamie,

You are right! Changing the gamma settings to Rec709-A makes the exported video, when watching in Quicktime, look closer to what you're seeing in Davinci Resolve. Only now it has a slightly brighter, less contrasty/more washed out look than the RAW footage and the timeline video. However when you're watching the same export in VLC it doesn't seem to have the same effect. Export with Rec709-A or with Rec709 2.4 looks the same in VLC. I find it quite annoying that you don't get the same look in both media players, knowing that PPro doesn't do that. Is there no other way in Davinci to get the same colors and brightness with your export in either media player? Or do you always have to anticipate on which media player you're going to watch the export with? Also, how do I know which gamma settings I have to use in general? Is Rec709 2.4 the standard? I don't really know how that works yet.

As for the pixelation, setting my project settings resolution to 1920x1080 in stead of 4K, fixed the problem! No more pixelation. The clips were still a bit stuttering because of the different frame rates, as expected. Like I said before, changing those clips from 30 fps to 25 fps in the clip attributes made them more smooth but also a bit slower. I'm trying to find a way of combining multiple timelines with different frame rates in to one export video with good results (without changing the frame rate in the clip attributes). Do you know if that's possible? Or do you always have to change the frame rates of your clips to match the project settings to get good, smooth results? I saw some video's online that it is possible but I haven't managed to do so yet. Like in this video below, but there's no explanation on how to export those timelines into one video...

To view this content we will need your consent to set third party cookies.
For more detailed information, see our cookies page.

Anyways, thank you so much, Jamie, this is already such an improvement.

Cheers,

Briek
 
Last edited:
The following should help clarify the difference:


Premiere Pro makes an assumption of the gamma of your monitor as that we use in the broadcast world: 2.4 whereas 1.96 is what Apple has used historically and is closer to real life.

Most video cameras will record in 2.4 and so Premiere Pro’s assumption is understandable to keep things simple. Davinci Resolve is a whole lot more capable system and it doesn’t make assumptions for you.

With regards to you different frame rates, you could create a new timeline for each different rate and then export each as a new media clip at the frame rate you need for the rest of you edit. Then drop the new clips onto your main timeline and edit as required. You my need to adjust the playback speed of these clips to match the main timeline clips.
 
The only way you can have a smooth mix of footage of different framerates is to change how they're interpreted in clip attributes and make do with the speed change, anything that maintains speed will cause stutter, no way around that. You have to be careful to shoot everything at the same framerate to avoid that.

Regarding colors you should also look into your graphics card control panel. There are typically specific controls for how to handle color/contrast/levels for video that may differ from the desktop handling, and whether a prrogram/player uses one or the other can lead to different results.
 
You are right! Changing the gamma settings to Rec709-A makes the exported video, when watching in Quicktime, look closer to what you're seeing in Davinci Resolve. Only now it has a slightly brighter, less contrasty/more washed out look than the RAW footage and the timeline video. However when you're watching the same export in VLC it doesn't seem to have the same effect. Export with Rec709-A or with Rec709 2.4 looks the same in VLC. I find it quite annoying that you don't get the same look in both media players, knowing that PPro doesn't do that. Is there no other way in Davinci to get the same colors and brightness with your export in either media player? Or do you always have to anticipate on which media player you're going to watch the export with? Also, how do I know which gamma settings I have to use in general? Is Rec709 2.4 the standard? I don't really know how that works yet.

Try setting the color space to Rec709 (instead of 709-A). Rec709-A was developed specifically to address color issues in Quicktime, but my guess is that the original clips are probably in Rec709, so while Rec709-A will likely be more consistent across platforms, Rec709 might match the originals better.

As for the pixelation, setting my project settings resolution to 1920x1080 in stead of 4K, fixed the problem! No more pixelation. The clips were still a bit stuttering because of the different frame rates, as expected. Like I said before, changing those clips from 30 fps to 25 fps in the clip attributes made them more smooth but also a bit slower. I'm trying to find a way of combining multiple timelines with different frame rates in to one export video with good results (without changing the frame rate in the clip attributes). Do you know if that's possible? Or do you always have to change the frame rates of your clips to match the project settings to get good, smooth results? I saw some video's online that it is possible but I haven't managed to do so yet. Like in this video below, but there's no explanation on how to export those timelines into one video...

Try making a new timeline at 29.97 fps, and in Project Settings, under the Master Settings tab, at the bottom in the Frame Interpolation section, try changing Retime process from Nearest to Optical Flow. Your results might vary on this one, but what you're basically doing here is telling Resolve to create new frames for the lower-framerate clips, which should help smooth out some of the stuttering. It's usually pretty good at guessing what the in-between frames should look like, but you might get the occasional weird artifact. If you're finding a lot of weird artifacts, you can go back and turn up the Motion estimation mode (set to Standard Faster by default).
 

DJI Drone Deals

New Threads

Forum statistics

Threads
134,581
Messages
1,596,494
Members
163,085
Latest member
blottje
Want to Remove this Ad? Simply login or create a free account