

- Joined
- Sep 13, 2018
- Messages
- 42
- Reactions
- 0
- Age
- 58
Hello all,
I am new to the forum and writing this post with the hope that someone experienced with repair parts can give me some good recommendations. In an attempt to repair the gimbal of my Mavic 2 Pro, I overlooked the challenge of reconnecting the electrical ribbon cables through their minuscule connectors and ended up damaging the connector of the cable attached to the yaw motor.
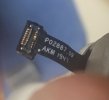
The two pics below show the connector position in the yaw/roll arm and the damaged connector.


My two questions are
1) Is it easy to replace just the yaw motor or is it better to replace the whole arm with both motors and respective cables? While there are many instructional videos that show how to disassemble and reassemble the gimbal system, I have not found any showing how to replace just the yaw motor, which makes me suspect it might not be an easy task.
2) If I have to replace the whole yaw/roll arm, does anyone know whether this part is the same for Mavic 2 Pro and Mavic 2 Zoom? Looking at the pics posted on different sites I do not see any immediately recognizable difference in this part between the two models. What made me suspect this specific part might be the same for both models is that some part vendors seem to implicitly indicate so by showing just a single part under the name Pro/Zoom, and the curious coincidence that almost all the vendors on Aliexpress show them as two different parts, but always have the Pro part out of stock. So one has to assume that either the part for the Pro version is unilaterally affected by some weird shortage or that, being the same part, the vendors do not bother to differentiate them in their inventory. What seems to throw a wrench into my assumption is my recent discovery of this vendor, who carries both parts for a very different price: $60 for the Zoom part and $107 for the Pro part. However, once again I can't see any difference in the pics. Can the vendor be just playing with the perceived unavailability of the Pro part in an attempt to sell the same part at a higher price?
I appreciate anyone who could help me shed some light on the subject. Thanks
I am new to the forum and writing this post with the hope that someone experienced with repair parts can give me some good recommendations. In an attempt to repair the gimbal of my Mavic 2 Pro, I overlooked the challenge of reconnecting the electrical ribbon cables through their minuscule connectors and ended up damaging the connector of the cable attached to the yaw motor.
The two pics below show the connector position in the yaw/roll arm and the damaged connector.
My two questions are
1) Is it easy to replace just the yaw motor or is it better to replace the whole arm with both motors and respective cables? While there are many instructional videos that show how to disassemble and reassemble the gimbal system, I have not found any showing how to replace just the yaw motor, which makes me suspect it might not be an easy task.
2) If I have to replace the whole yaw/roll arm, does anyone know whether this part is the same for Mavic 2 Pro and Mavic 2 Zoom? Looking at the pics posted on different sites I do not see any immediately recognizable difference in this part between the two models. What made me suspect this specific part might be the same for both models is that some part vendors seem to implicitly indicate so by showing just a single part under the name Pro/Zoom, and the curious coincidence that almost all the vendors on Aliexpress show them as two different parts, but always have the Pro part out of stock. So one has to assume that either the part for the Pro version is unilaterally affected by some weird shortage or that, being the same part, the vendors do not bother to differentiate them in their inventory. What seems to throw a wrench into my assumption is my recent discovery of this vendor, who carries both parts for a very different price: $60 for the Zoom part and $107 for the Pro part. However, once again I can't see any difference in the pics. Can the vendor be just playing with the perceived unavailability of the Pro part in an attempt to sell the same part at a higher price?
I appreciate anyone who could help me shed some light on the subject. Thanks


![IMG_20220928_153643_1[1].jpg](https://mavicpilots.com/data/attachments/155/155242-5f87196ba3d8e669099ead15ea75f9a0.jpg?hash=X4cZa6PY5m "IMG_20220928_153643_1[1].jpg")

 Pro (bevelled edge to yaw arm).
![IMG_20220928_153756_1[1].jpg](https://mavicpilots.com/data/attachments/155/155243-81e3480987db4c6a496e4629073eaa51.jpg?hash=geNICYfbTG "IMG_20220928_153756_1[1].jpg")


