DJI Mavic, Air and Mini Drones
Friendly, Helpful & Knowledgeable Community
Join Us Now

How difficult is it to replace Mavic rear arm?

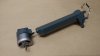
@Thunderdrones it is possible to break this tap by frequently doing hard braking in high sped or will this break only in the event of a crash ?

I have seen them break clean off during a crash but have also seen stress cracks due to hard landings or hard flying. If you do a lot of hard braking just keep checking the tabs for small cracks and if they get worse.
 
  • Like
Reactions: facasi
Here is a picture of my broken arm. I tried to move a bit sideways for a picture and clipped a tree.
Damaged the camera gimbal as well I think because all I got was a gimbal overload error message.
I managed to replace both camera and arm without a problem and got back in the air.
Got my parts on eBay from Jenny's RC.
Had a question about removing the motor.
Assuming there are screws under the black cap, how do you get the cap off without doing any damage?
 

Attachments

  • 20171012_212632.jpg
    20171012_212632.jpg
    5.8 MB · Views: 83
I managed to get mine apart and remount the "journal" thing that the arm goes into. The holes where the screws go are half broken off but after I got it all back together it feels pretty solid and the arm folds in and out like it should. I still want to get that part that @Thunderdrones sells for $29 just to be sure before I fly again. Now I just need to figure out how badly I damaged the gimbal assembly. I can see a broken part but I'm not sure where it's broken from, and the whole gimbal is just dangling by the ribbon cable. After the rash it still showed footage on my screen, so hopefully I just broke the plate that holds the gimbal in place. Being a noob at this is nerve racking sometimes. I do have the mavic insured thru State Farm, but I don't want to make a claim then have then drop me if it's something I can fix myself.
 
Rear arm, there's a spring providing axial tension inside the hinge assembly. Upon further investigation, I think the set screw just attaches the 90 degree bracket to the plastic arm, and doesn't hold the metal rod (that runs inside the spring) in place. My guess is that the 90 bracket holds the metal rod in place, but I cannot for the life of me get it to clip back on.
 
Yes you're right. I meant that the rear arms do not require any setting of spring tension, as do the front arms. You just have to have the rear arm extended for installation.

My guess is that the 90 bracket holds the metal rod in place, but I cannot for the life of me get it to clip back on.

Sometimes the 90° metal bracket breaks off the piece it is connected to. Then you will not be able to center it, and it won't hold even if you do. Does the 90° spin around and rotate freely? If so, it has broken off the metal rod.
 
Ah thanks, the 90 degree piece is completely separated from everything else. Guess I just need a new arm then.
 
Ah thanks, the 90 degree piece is completely separated from everything else. Guess I just need a new arm then.
.
Can you post some pictures just to make sure?

BTW, as you probably already know, that piece is pretty fragile. It breaks off very easily, so when installing the new arm, try to line that silver hole up through the plastic hole in the arm, and you can just get it very gently hand tight. If it turns too much it can strip or break off.
 
If anyone has a 3D printer available to them and need this part, I found the free STL files on thingiverse.com. Too bad I found it after I already bought a complete new arm that came with that part.

@Thunderdrones - when replacing the new rear arm, would it be ok to just cut the wires and butt splice the new one instead of unsoldering the wires from the board then soldering the new ones in place? I have a good soldering fun that can reach the proper temperature no problem, but I figured butt splicing the wires would be less risky to the board, just not sure if it would work properly or not.
 
  • Like
Reactions: ciropizzutilo
did however notice it visually as that arm moved substantially more than the other 3, especially in windy conditions. I ultimately decided to replace the arm because I didn't want to see what might happen if all that extra mov
If anyone has a 3D printer available to them and need this part, I found the free STL files on thingiverse.com. Too bad I found it after I already bought a complete new arm that came with that part.

@Thunderdrones - when replacing the new rear arm, would it be ok to just cut the wires and butt splice the new one instead of unsoldering the wires from the board then soldering the new ones in place? I have a good soldering fun that can reach the proper temperature no problem, but I figured butt splicing the wires would be less risky to the board, just not sure if it would work properly or not.

Did you ever try the splicing? Was reading another thread and saw that @Brojon was able to splice his.
 
Did you ever try the splicing? Was reading another thread and saw that @Brojon was able to splice his.
No I didn’t. As I got the arm back together I noticed only the small loops that the screws go into weee only broken on the outermost part, and when mounted back with the screws they seemed to hold the journal well. Instead of replacing the arm I just remounted it with the same piece that was “kinda” broken and I’ve had several safe and successful flights since. Now I have a new arm on the shelf waiting for it to give out. I was just going to go ahead and replace it but it seemed so solid that I had to try it as it was, and so far I can’t see any flex or anything.
 
  • Like
Reactions: dajohn17
I'd suggest if you wish to try repair this support piece use a cyanoacrylate such as Loctite 416 or what is commonly called either super glue or crazy glue rather than an epoxy. Note that although it is known for "instant" bonding it takes about 24 hours for it to cure completely but should create a bond equal to or better than the original strength.
 
  • Like
Reactions: dajohn17
Lycus Tech Mavic Air 3 Case

DJI Drone Deals

New Threads

Forum statistics

Threads
130,592
Messages
1,554,167
Members
159,594
Latest member
mini2+