DJI Mavic, Air and Mini Drones
Friendly, Helpful & Knowledgeable Community
Join Us Now

Mavic Air 1 Cover Screws

spencer_u41

New Member
Joined
Oct 7, 2024
Messages
2
Reactions
0
Age
44
Location
Michigan
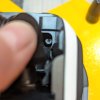
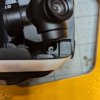
I'm trying to fix the IMU issue on my DJI Mavic Air 1, but I cannot remove the cover. I know it's been discussed here: Screw driver Mavic Air. If you look at the photos, it doesn't look like PH00 to me.
PXL_20241007_041744134.jpgPXL_20241007_041755722.jpg

I messed around with the right screw more than the left side. Is this the plastic cover that I'm supposed to pry off? If yes, what's the thick? I'm at a loss and have tried everything from PH00, T3, T3, H0.9, and H1.3.

Any suggestions are appreciated.
 
The screws can be covered by a drop of anti-tamper glup and they may be Torx screws rather than cross heads. Torx heads look very like Allen heads but Torx have lobes, best get a set of Torx drivers do that you can find the correct size.
DJI cross heads may not be Phillips but made to some other standard/format. They can also be very difficult to remove especially given the tiny size of some of the cross slots and keeping the screw driver square is essential and can be difficult.
 
Last edited:
You need to take a small awl and remove the warranty Epoxy from the screw heads even the one that dont look like they have any may have a tiny bit inside the screw head. Otherwise you are going to have a Drone with a bunch of stripped screws.
Also --That screw you are trying to remove should stay put until you get some other stuff done first. If you do remove those screws you will most likely have to purchase new ribbon cables. Those screws connect the gimble to the Gimble board once removed the gimble will bang about freely damaging the ribbon cables. Start with the top shell!
 
Last edited:
They look like plastic to me. The patination is identical to the surrounding bodywork. I think that you have to prise the front cover off and there are screws hidden underneath.
 
Last edited:
I fixed it!

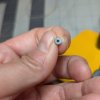
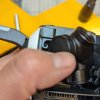
In case someone found this post later, the right screw (photo above) looks like it was stripped, but it's actually because the epoxy is partially scraped off from me trying to unscrew it with various drivers. The left screw has epoxy intact. When I looked at it, I thought it was concave, like I was supposed to use trox or hex to unscrew it. But it's actually convex. It's a drop of epoxy! Scrape that off, and the PH00 screw will reveal itself to you. Tada!

PXL_20241008_031338557.jpgPXL_20241008_032001008.jpg

Thank you for your input and for taking the time to respond to my question.

I also fixed the IMU issue, but that's another story :)

Cheers!
 
like I was supposed to use trox or hex to unscrew it
Well, ....... If you are going to do DIY repairs then you need to a able to recognise that the 'screw's drives' are,at least of differing forms. That's a pretty basic requirement.
If the screw'sd drives are so small that your unaided eyes struggle then use a magnifier app on a phone or a magnifying glass or head mounted magnifying glasses. I use the latter.

If it is a torx screw then use of an Allen key or bit to turn it is risky.
It's very rare that an Allen key is a perfect fit for the hex portion of the torx hole and you risk damaging the lobes of the torx hole if you use a poorly fitting Allen key.
Torx bit sets are cheap, especially in comparison to the problems a damaged torx hole would cause you especially if the screw is deep in a recess.
 

DJI Drone Deals

New Threads

Forum statistics

Threads
135,088
Messages
1,602,304
Members
163,575
Latest member
foooz
Want to Remove this Ad? Simply login or create a free account