@Nofate,
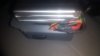
I would be interested in how you connected the balance leads of the second DJI battery pack cells to the primary battery. I cut open one pack and piggybacked it in top of the main battery and soldered the main woes in parallel. I then linked jumper wires from the individual main battery cells to the piggy back cells to try and get one large battery mah readings during the flight but doesn't seem to quite work that way.
I just ordered two new replacement batteries from DJI and need to cut up another one as I think I fried the controller board on the main battery that I was using for the piggy back one to join.
My objective is to find a simple and almost none intrusive (AC) way to run with more than one standard DJI battery. So like you just drilling/cutting access holes in to a battery and soldering in the jumper battery on to it.
Please can you share your video link once you have posted it.