Let's not forget composition as well, that is a great help in creating a "pleasing to the eye" image.
So to recap simply, the ISO allows you to be able to take photos in darker situations without using additional lighting, however, there are drawbacks.
Low ISO like 100 means very clear images, with very, very little grain (in film days) noise (in digital speak). So the photo is more clear with a lower ISO like 100. In film days we called it ASA for the film speed with the average being about 125 ASA.
Now go to 1,600 ISO and you can shoot in much darker looking (to the eye) lighting situations and the camera will make the image look brighter to you in the view finder. With that said, the image will also look more degraded, which means less clear, because when you zoom in on a section of the image, especially the darker areas, you will see a lot of grainy looking sections or noisy looking parts of that image, which generally give you a somewhat more obscured or slightly less clear looking, image.
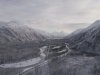
Therefore if you come across a UFO at night, crank up the ISO as high as it will go, and come home with a viewable image of it, rather than say it is too dark, I won't shoot it. But of course you would not do that if you were taking a photo of your daughter at her wedding.
The way around poor light yet keeping a low ISO is to reduce the speed of the shutter, so that means keeping it open for a longer time to allow more light in. That also means that if you want to freeze any action, that will not be happening. Slower shutter speed means more light falling on the sensor for a brighter looking image but you won't be freezing action. Faster shutter speed means less light falling on the sensor but you are getting closer to freezing the action in motion. Shutter speed depends on two things, what you are trying to achieve and how much light you have to play with to get a satisfactory image.


")


")