You are using an out of date browser. It may not display this or other websites correctly.
You should upgrade or use an alternative browser.
You should upgrade or use an alternative browser.
Left back arm came loose when hitting a branch...
- Thread starter Sjassie
- Start date
Yorkshire_Pud
Well-Known Member
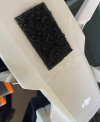
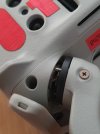
I would suggest the main shell needs replaced.
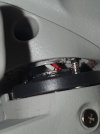
Even if the lugs that contain the screw holes are intact, the female threads within those lugs are almost certainly stripped, I would worry about the security of any glued in screw.
If the drone is not under warranty or you are not concerned about warranty/care-refresh and you can solder, it is a fairly easy job to replace the main shell, I have done it with a bought-for-parts crashed Mini 2. But you would need to ensure you bought a Mini 2 shell, a Mini SE shell might work, but a Mavic Mini shell will not, the MM's USB opening will be wrong and there is no front LED in the Mavic Mini shell.
If the drone is under warranty and you care about the warranty it's a send it in for repair situation, glued in screws and a DIY shell replacing would void the warranty.
Last edited:
And probably create more problems when the glue fails.glued in screws would void the warranty
Yorkshire_Pud
Well-Known Member
quite true.And probably create more problems when the glue fails.
incase any one wonders I edited the post that Stars quoted which is why the phrases differ.
Flashheart
Well-Known Member
Indeed, those black bits of plastic look like they were formely threads. That needs to be sent off for repair, don't patch it up. Ignore any suggestions/temptations of home repairs that risk total failure/loss and depreciate the value of your investment.
Yorkshire_Pud
Well-Known Member
Sorry nope, the female threads pulled out by these screws will be white/grey i.e. the same material and colour as the drone's body, the screws are "self tappers" and cut their own thread.Indeed, those black bits of plastic look like they were formely threads. That needs to be sent off for repair, don't patch it up. Ignore any suggestions/temptations of home repairs that risk total failure/loss and depreciate the value of your investment.
Where thread inserts are used, the insert is generally brass and the screws are "machine screws".
I suspect the black is either dirt or a black paint/glue that DJI use in that area.
@Yorkshire_Pud
Forgive me if I hijack this thread for a moment, but you seem knowledgeable to guide me and I know nothing about the internals and repairs of the Mini 2. However I would consider myself to be somewhat handy (when I know what I'm doing). I just don't want to get over my head, not knowing what I could break while trying to fix something.
I have a cracked hull on my Mini 2 which I'd like to replace as I might like to sell it down the road (now that I have a Mini 3). The upper shell is the only damage and everything else functions perfectly. I've pushed the hull back in place and put a coat of Elmers Glue on top to seal it and it's fine if I left it this way. But an upper shell costs $20 so much cheaper and faster than paying DJI $50 for a C/R deductible and having the drone tied up for two weeks.
What's involved in replacing the upper shell/hull? TIA

cheddar-man
Well-Known Member
Looks like you were flying backwards?
If you've got Care Refresh send it in, that's what it's for! Otherwise, as suggested, get a new casing and move all the parts over.
In the UK......
If you've got Care Refresh send it in, that's what it's for! Otherwise, as suggested, get a new casing and move all the parts over.
In the UK......
Yorkshire_Pud
Well-Known Member
Replacing JUST the upper shell is a walk in the park. There are many youtubes showing the process (as part of dismantling the drone to give access for repair of something else video and or possibly as a "replace the top cover" video in its own right ) but watch all you can find as some videos are made by ham fisted idiots.
From memory you need to remove 4 screws ( be careful, I seem to remember them be only very weakly magnetic so, if you drop one, 'sweeping the floor' with a magnet is not guaranteed to be successful ) and then it's just clips.
I am wondering if a bit of careful heating with a hair drier might reduce the chances of breaking clips, I haven't needed to split a shell since I thought of that so it's only speculation.
DO NOT let a prying tool slip or go deeply inside the drone, there are things in there that could possibly be damaged in a slip etc.
With regards to your photo, I would be a bit concerned that such a big crack caused some damage to the middle shell which might be internal. If you are going to try a DIY repair I would remove the top shell and check the middle shell BEFORE I bought the replacement top shell.
I also have come concern that glue residue might prevent the new top shell seating properly in some places.
If you need to replace the main/middle shell it's a fully strip down and rebuild including all the soldering and peeling the ribbon cables off their stick-down places, hair drier heat DOES help there, PLUS you need to be careful aligning those cables etc. in a new body. Part of one ribbon cable leads to an isolated chip on the left of the drone, the chip is glued to the shell with two blobs of that white silicon that DJI like, it needs care to remove the cable/chip assembly.
Last edited:
Does the top shell just pry off, or do screws need to be removed from the bottom first?Replacing JUST the upper shell is a walk in the park. There are many youtubes showing the process (as part of dismantling the drone to give access for repair of something else video and or possibly as a "replace the top cover" video in its own right ) but watch all you can find as some videos are made by ham fisted idiots.
From memory you need to remove 4 screws ( be careful, I seem to remember them be only very weakly magnetic so, if you drop one, 'sweeping the floor' with a magnet is not guaranteed to be successful ) and then it's just clips.
I am wondering if a bit of careful heating with a hair drier might reduce the chances of breaking clips, I haven't needed to split a shell since I thought of that so it's only speculation.
DO NOT let a prying tool slip or go deeply inside the drone, there are things in there that could possibly be damaged in a slip etc.
With regards to your photo, I would be a bit concerned that such a big crack caused some damage to the middle shell which might be internal. If you are going to try a DIY repair I would remove the top shell and check the middle shell BEFORE I bought the replacement top shell.
I also have come concern that glue residue might prevent the new top shell seating properly in some places.
If you need to replace the main/middle shell it's a fully strip down and rebuild including all the soldering and peeling the ribbon cables off their stick-down places, hair drier heat DOES help there, PLUS you need to be careful aligning those cables etc. in a new body. Part of one ribbon cable leads to an isolated chip on the left of the drone, the chip is glued to the shell with two blobs of that white silicon that DJI like, it needs care to remove the cable/chip assembly.
As far as internal damage, I highly doubt there is any. The Mini 2 fell from a 2 ft table and everything else is solid. This drone had a much larger indoor crash months ago where it accelerated into an 8' ceiling HARD, and then crashed straight down to the floor. The damage? Top hull crack and it "spit out" the protective plastic window on the camera. But no gimbal damage or anything else. It was sent to the DJI Drone Service and they repaired it reporting that only the hull was damaged and the lens "window" was simply "spit out". I was surprised as how hard the Mini 2 hit the ceiling and floor. This last boo boo was nothing in comparison and I was suprised to see a crack in the hull. I suppose if it lands hard on the legs the drone flexes and the top hull has the least support.
Yorkshire_Pud
Well-Known Member
@vindibona1
4 screws hold the top to the middle/main-shell of the drone. With the arms in the flying positions they are the 4 screws in 'deep' holes that are visible. Two are just in front of the front arm pivots ( black things) and the other two are inboard of, and just behind the rear arm pivots.
I am on the wrong computer to post take and post a photo.
Last edited:
Just a heads-up, i bought a middle shell on ali and after i got it it was broken so needed to order again. But it worked. Replaced all the parts. Soldered the arms and all in all it was an easy job. So for 50euro and 4 new propellor kits my drone is good as new!
Happy me and just in time to take on holiday!
Happy me and just in time to take on holiday!
Similar threads
- Replies
- 2
- Views
- 940
- Replies
- 21
- Views
- 3K
- Replies
- 2
- Views
- 2K
- Replies
- 16
- Views
- 5K
DJI Drone Deals
New Threads
-
-
-
Possible to sell RC Pro 2 controller separately from drone it came with?
- Started by Robw_z
- Replies: 5
-
-
Would an outdoor WIFI 6 range extender interfere with DJI drone flights?
- Started by jmc667
- Replies: 3


