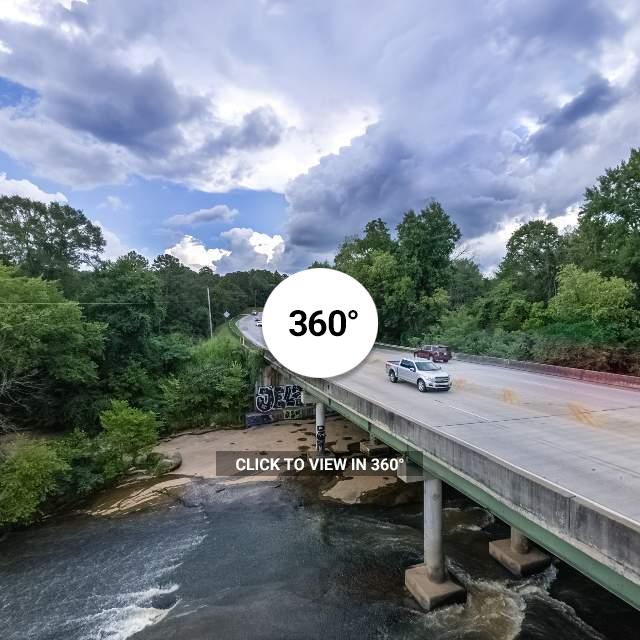
DJI Mavic, Air and Mini Drones
Friendly, Helpful & Knowledgeable Community
Join Us Now

M2P Panos

Those are some very cool shots. The second one with the sun is my favorite, but they're all cool.

Where did you "find" the pano setting? I was flying today (nowhere fancy, just at the house to get more acquainted with my M2P) and couldn't even find the HDR setting while I was out there. So much hidden in this gem, but sometimes gets a bit overwhelming.
 
It can be for sure. This setting is under the menu of the camera. Its not intellegent flight mode. Its the menu just under the red button to shot pics , then look for photo at top in photo mode. Just touch photo and you will see the drop down with picture modes. Hope this is clear.
 
  • Like
Reactions: dirkclod
How does the pixel count in Pano mode compare to "normal" (ex. 4:3)?

There's a few different panorama modes which take different numbers of photos and it's going to depend how you crop it how many pixels you have. For example, this screenshot shows the 21 photos stitched together from the 180 degree mode showing how much is cropped out to make the final photo:

Panorama_Crop-X3.png


You can see how those photos are organised here:

Panorama_Numbered-X5.jpg


The exported photo from here is 18033 x 5948 which works at around 100MP whereas a standard shot is 20MP.
 
  • Like
Reactions: mrjohnc1
Nice photo - have you looked into how to print it. The width to height aspect ratio has me thinking. I believe the large MP count is doable but the size of the print may be the sticking point.
Thanks, BC
 
Thanks for sharing. Overall these you did a good job capturing the scenes. Here’s a few pointers from a photography perceptive: (1) Try to avoid a 50-50 split. In this case you have about equal amounts of sky and landscape. In most case go for more landscape vs sky. (2) The landscape portions are underexposed. This adjustment can be tricky in post (But can be done.) as you don’t want to end up overexposing the sky which is pretty much spot on.
 
Had my M2P for over a year, just found this feature. Wanted to share. Comments welcomeView attachment 97289View attachment 97290View attachment 97291


My first comment is that you captured a beautiful scene. My second comment is that you really need to open up the foreground. It is practically all dark with no details I'm not sure how you are processing. Probably you let the drone process the pano. Now bring that image into your photo editing software (I use Photoshop CC), and then I use a gradient filter from below up and use the shadow slider to open the foreground. did a screen grab of the last image and used a gradient on the lower half. Of course I didn't have all of your pixels on file so it is blurry but you get the idea.
Screen Shot 2020-03-27 at 3.18.59 PM.jpg. I'm not sure how you are processing. Probably you let the drone process the pano. Now bring that image into your photo editing software (I use Photoshop CC), and then I use a gradient filter from below up and use the shadow slider to open the foreground.

Dale
Miami

I
 
  • Like
Reactions: G Lee
Nice photo - have you looked into how to print it. The width to height aspect ratio has me thinking. I believe the large MP count is doable but the size of the print may be the sticking point.
Thanks, BC

I was looking at a printing service that offered multiple portrait photos so you could get a standard photo split into three which worked quite well but you could have panoramic photos as well by adding more photos. I've seen some companies offering ultra wide aspect printing which I've been meaning to try out.

What I do love doing with my panoramas is cropping them a little down to a 21:9 aspect ratio and putting them on my work monitor which is an ultrawide 34in 3440x1440, it's a slightly narrower than the 180 degree panorama but I think it works better as it doesn't look too wide. It makes the photos look great and motivates to go and get the Mavic 2 out more.

With regards to the OP's photo with the dark foreground one of the big advantages of the Mavic 2 Pro's large sensor is that you can recover a lot of details in under and over exposed areas plus with Lightroom (and I'm sure other applications) when it stitches the photos in the panorama together it treats them as one large raw photo you can adjust the same as a normal raw photo. You can see a similar shot here which is also a panorama with an underexposed foreground which I've brought back by just changing one slider:

i-rMRgN74-X3.png
 
Thx all for the info. I will try some post next time. Ive never done post on vids or pics from my drones. Thx again
 
Some more aspects:
You can store the multiple shots also as raw images and stitch them in software, e.g. lightroom. There you can easily balance light and shadow exposition.
For sphere pictures you can leave out the vertical pictures (4&17) and get a perfect 360° image (about 26000 Px) without extreme distortions at the bottom and even of underexposed shots, example:
DJI_0529.jpg
The vertical angle of the shots is not adjustable for 360&180° panos. The first image is always horizontal. Only the vertical pano starts at actual position plus one shot above and one below. If necessary Mavic turns 180° for the last shot.
 
There's a few different panorama modes which take different numbers of photos and it's going to depend how you crop it how many pixels you have. For example, this screenshot shows the 21 photos stitched together from the 180 degree mode showing how much is cropped out to make the final photo:

Panorama_Crop-X3.png


You can see how those photos are organised here:

Panorama_Numbered-X5.jpg


The exported photo from here is 18033 x 5948 which works at around 100MP whereas a standard shot is 20MP.
Do you have a similar organizational photo showing the 360° Pano stitching order? Haven't quite figured out the 26 photo order.
 
Here is how it's organized according to Pano00nn numbers (after manual repositioning in lightroom):Pano529-Orga.jpg
With this view you can easily stitch parts of the pano, e.g. only the 3 rows without vertical shots.
HTH
 
That's a Roman aqueduct... where is it ? I like it... there's one in the city of Arezzo, IT, near where I live.

It's the Culloden viaduct which carries the north/southbound railway traffic for Inverness in the north of Scotland, I've a short video of a couple of the evening services crossing it here:


SA900779-X3.jpg
 
  • Like
Reactions: m80116
I really thought it might have been something historic. Tbh now seeing it again in all of its glory it's far too tall and slim to be what I thought it was going to be.

Anyway... I tend to be fascinated by brick and mortar works :)
 
Lycus Tech Mavic Air 3 Case

DJI Drone Deals

New Threads

Forum statistics

Threads
131,229
Messages
1,561,063
Members
160,182
Latest member
Saikiran Villa