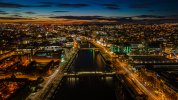
I am a big fan of Long Exposure.
These pictures are from the Dublin city centre over River Liffey. A bit frustrated with the noise, etc but I can't compare my Long Exposure pics with my Canon 5D MK 3 / 24-70mm F2.8 II with a Drone flying over a windy place.
Next time will try an ND FILTER and new adjustments.
Enjoy
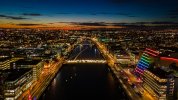
These pictures are from the Dublin city centre over River Liffey. A bit frustrated with the noise, etc but I can't compare my Long Exposure pics with my Canon 5D MK 3 / 24-70mm F2.8 II with a Drone flying over a windy place.
Next time will try an ND FILTER and new adjustments.
Enjoy
Attachments
Last edited: