Actually Lightroom ACR both crop the image from what is captured natively. Most don't realize this, as they don't have multiple raw converters to view. LR uses the DJI Manufacturer profile, there is no way to LR or ACR to change this that I know of. See screen shots below, from LR, and Capture One. Capture One allows multiple lens profiles besides the manufacturer profile, but also, when you load a DNG from the M2 Pro, by default C1 crops the image back to the profile. Note in my screen shot, the dark black edges. YOU can get this back in C1 by use of the crop tool, however the details towards these edges especially the side tend to be less than stellar with the stock profile. C1 allows use of a "generic" profile. I use this 90% of the time. Has other issues which can be worked around, however the edge sharpness is much better.
I don't know of anyway to alter LR/ACR to allow you to use full the full image. The
Mavic 2 Pro has no 4:3 ratio offering, 4:3 is similar to output like 16 x 20, or 11 x 14. The
P4 Pro offers this. The 16:9 ratio is not the same as 4:3.
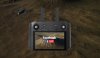
My attachments:
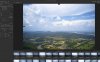
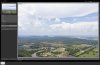
1. is C1 with the manufacturer profile where I used crop tool to stretch it.
2. is C1 with manufacturer profile showing stock load of image
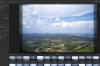
3. is LR showing it's only view available of same raw file, note it's available image info is equal to C1's before I stretched it.
Paul C