DJI Mavic, Air and Mini Drones
Friendly, Helpful & Knowledgeable Community
Join Us Now

Mini 2 Stitching DNGs in Photoshop

Dale D

Well-Known Member
Joined
Sep 13, 2018
Messages
7,156
Reactions
7,957
Location
Miami
Site
vimeo.com
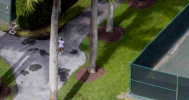
So I have been trying to learn my new Mavic 2 Mini to reproduce what I was easily able to do with the Mavic 2 Pro, I have finally had success. Here are the steps Have used and the resultant image;
1) Put the drone into the air an position it for taking three images
2) settings on Photo
3) adjust exposure
4) activate JPG+RAW
5) grid on
6) take three images, overlapping by at least 30%, left, middle, and right
7) Book-end before the first and after the last image on the ground with two images you will not use or keep, used as markers
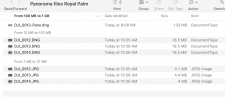
8) Open the SD card files on my iMAC. - Separate JPG from DNG so you have three DNG files
9) open Photoshop
10) open Bridge
11) highlight the three images in bridge
12) Select all (CTRL+A)
13) right click on any of the three images
14) hit Merge to Panorama
15) In dialogue window, play with the settings to your best judgement
16) in the final image, open into Photoshop for final editing
17) file>save as..... JPG of a small enough resolution for e0mailing- usually <1.5MB.Files for Royal Palm.png
 

Attachments

All that for a Picture that does not even come close to being a quality picture, Im not sure I see the benefits in the merge. Is that the Picture that is out of focus or just the Process.


screenshot_403.png

Are you just trying to show the Stitch process because the quality of the picture is just not there.
Have you compared it to just a normal wide Pano ?

Phantomrain.org
Gear to fly in the Rain. and land on the Water.
 
All that for a Picture that does not even come close to being a quality picture, Im not sure I see the benefits in the merge. Is that the Picture that is out of focus or just the Process.


View attachment 131514

Are you just trying to show the Stitch process because the quality of the picture is just not there.
Have you compared it to just a normal wide Pano ?

Phantomrain.org
Gear to fly in the Rain. and land on the Water.
Agree that it seems like a lot of steps but I am really just experimenting with my new toy and trying to see what is possible. I find the images generated by the Mavic 2 Pro in pano with this technique much better. E.g.: I take three overlapping images and stitch them together in Photoshop rather than accept the drone-generated image.

As a conclusion from these experiments, I will not be doing a lot of panos with the mini 2! Most of my panos are generated with the Nikon D750 , hand held or on a tripod, holding the camera vertically, then processing in Photoshop Photomerge for excellent results. I found from all of the work done on the Mini 2 that I am not going to waste my time doing panos with it.
 
  • Like
Reactions: Phantomrain.org
I find using the pano options in quickshots work fine and I stitch together with Microsoft ICE (free). So far ive been pleased with the results but then ive never had a Mavic Pro to compare against
 
  • Like
Reactions: Phantomrain.org
All that for a Picture that does not even come close to being a quality picture, Im not sure I see the benefits in the merge. Is that the Picture that is out of focus or just the Process.


View attachment 131514

Are you just trying to show the Stitch process because the quality of the picture is just not there.
Have you compared it to just a normal wide Pano ?

Phantomrain.org
Gear to fly in the Rain. and land on the Water.
Good morning,
I use Agisoft Metashape to produce ortho-photo-mosaics of downloaded images that have an overlap. Last project was 6 flights with about 1056 images for each flight (red, Green, blue, NIR, RGB and red edge) that all processed perfectly into one image for each flight.
Neville in Australia
 
  • Like
Reactions: Phantomrain.org
So I have been trying to learn my new Mavic 2 Mini to reproduce what I was easily able to do with the Mavic 2 Pro, I have finally had success. Here are the steps Have used and the resultant image;
1) Put the drone into the air an position it for taking three images
2) settings on Photo
3) adjust exposure
4) activate JPG+RAW
5) grid on
6) take three images, overlapping by at least 30%, left, middle, and right
7) Book-end before the first and after the last image on the ground with two images you will not use or keep, used as markers
8) Open the SD card files on my iMAC. - Separate JPG from DNG so you have three DNG files
9) open Photoshop
10) open Bridge
11) highlight the three images in bridge
12) Select all (CTRL+A)
13) right click on any of the three images
14) hit Merge to Panorama
15) In dialogue window, play with the settings to your best judgement
16) in the final image, open into Photoshop for final editing
17) file>save as..... JPG of a small enough resolution for e0mailing- usually <1.5MB.View attachment 131510
If you are a Lightroom user the workflow is a little simpler. Import all your files into Lightroom, select the three DNGs you want to pano in LIBRARY, go to PHOTO=>PHOTO MERGE=>PANORAMA, then after it completes take it into DEVELOP.
 
  • Like
Reactions: Phantomrain.org

DJI Drone Deals

New Threads

Forum statistics

Threads
134,628
Messages
1,596,979
Members
163,117
Latest member
Autenien
Want to Remove this Ad? Simply login or create a free account