Hi gang,
This is a question for people who are actually making QUALITY prints for sale. I've been a photographer for 40 some years. Shot with many many cameras & formats. Rarely needed to make veery large prints - although for some commercial shoots have had very large prints or I should say PRINTED photos done on large format printers that only needed ~72 to 110 pixels per inch to make huge enlargements. 11' tall from a Nikon D300 (12mp I think) file.
Once had a 3 frame pano from my Phantom 3 Pro made into a billboard. THAT was cool....
But the viewing distance on those things was pretty far back and it worked.
What I want to know now is how large can I go with a Drone photo - single frame 20mp, and with multi frame panos of a QUALITY print. One that people will purchase & frame in their home.
I know that some of you do this now. I know with things like Gigapixel AI we can push the size a bit more. Inkjet prints can be very well done.
Some of my multi-row panos end up in the 30~50mp range in size, almost as big as my Nikon D850 as far as actual pixel dimensions.
So, what is realistic in the largest art quality print I can offer people. I don't want to say - "sure I can make a 20"x 60" pano" or larger, and have it looking crappy.
What are you all doing and what methods are you using to get to that size?
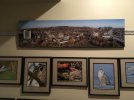
Example - the full size file of the image below after stitching is 11,180 x 2901 pixels or 37.26" x 9.27" @ 300ppi. How large can this go and still look excellent?
This is a question for people who are actually making QUALITY prints for sale. I've been a photographer for 40 some years. Shot with many many cameras & formats. Rarely needed to make veery large prints - although for some commercial shoots have had very large prints or I should say PRINTED photos done on large format printers that only needed ~72 to 110 pixels per inch to make huge enlargements. 11' tall from a Nikon D300 (12mp I think) file.
Once had a 3 frame pano from my Phantom 3 Pro made into a billboard. THAT was cool....
But the viewing distance on those things was pretty far back and it worked.
What I want to know now is how large can I go with a Drone photo - single frame 20mp, and with multi frame panos of a QUALITY print. One that people will purchase & frame in their home.
I know that some of you do this now. I know with things like Gigapixel AI we can push the size a bit more. Inkjet prints can be very well done.
Some of my multi-row panos end up in the 30~50mp range in size, almost as big as my Nikon D850 as far as actual pixel dimensions.
So, what is realistic in the largest art quality print I can offer people. I don't want to say - "sure I can make a 20"x 60" pano" or larger, and have it looking crappy.
What are you all doing and what methods are you using to get to that size?
Example - the full size file of the image below after stitching is 11,180 x 2901 pixels or 37.26" x 9.27" @ 300ppi. How large can this go and still look excellent?