DJI Mavic, Air and Mini Drones
Friendly, Helpful & Knowledgeable Community
Join Us Now

A couple of photography questions

@mrfish, when you're exploring panoramas, don't let the better be the enemy of the good. You can certainly get much better results using individual photos and stitching them yourself. But, the panoramas stitched by the drone are pretty darn good. And they're more than adequate for sharing on phones, tablets, and computers with less than wonderful graphics capabilities.

I'd suggest shooting some automated panoramas on your next flights, after the wind settles. I can almost guarantee that you'll be stunned with the results and you'll have some good fun, too.
For the 180 Panos, I don't like the distortion of the image that dji creates in-drone (Air 2S). Using lightroom to do Panos was a game changer for me.

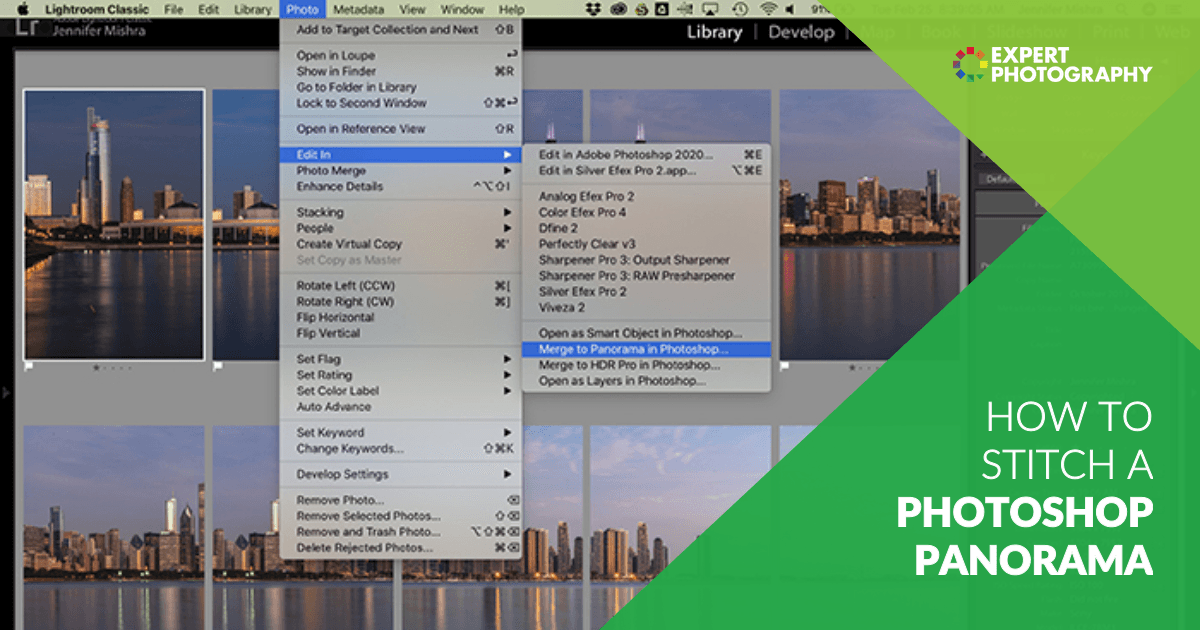
What I do often is shoot the 180 pano and save the individual photos. In lightroom I will find a section I want and stich those together. I find going more than 3 across starts distorting the image too much.

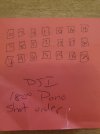
A challenge is knowing which photo is in which part of the image. I drew out a mapping that makes it easy to determine.

17106013161983408473118607369369.jpg
 
  • Like
Reactions: mrfish
For special photos, I will switch the camera to vertical mode, put it into 48 MP RAW and then take a photo, and turn the camera left or right, not the drone, just the camera, take a photo, move it 30%, take another, and then i can stich them in photoshop real easily. Its not quite gigapixel but it can bring out tremendous detail.

Heres two examples of the process output.
View attachment 173336

View attachment 173335


BONUS

Put camera back into landscape mode, but instead of moving camera left or right, move the camera gimbal from down 90 to up and you can create IMPOSSIBLE INCEPTION type shots. Let me post some examples.

View attachment 173337

For the above. I start by having camera look straight down, then gimbal towards the horizon about 30%, take a pic, repeat. Then photomerge in photoshop. After that, flatten the layers, and then tweak using the RAW camera filter.

Heres one more for fun. Again, the effect is you are looking straight down and at the horizon at the same time.

View attachment 173338
Beautiful images. I use the same technique shooting in RAW and have been able to make high quality images that I have printed 24"x30" It take a little more effort but the resulting images are of a higher quality and with more data are easier to edit/crop.
 
For the 180 Panos, I don't like the distortion of the image that dji creates in-drone (Air 2S). Using lightroom to do Panos was a game changer for me.

What I do often is shoot the 180 pano and save the individual photos. In lightroom I will find a section I want and stich those together. I find going more than 3 across starts distorting the image too much.

A challenge is knowing which photo is in which part of the image. I drew out a mapping that makes it easy to determine.

View attachment 173486
I was thinking that changing the order from side to side would reduce the distortion.
 
  • Like
Reactions: Jug's Life
So, I'm understanding that you're panning the camera/gimbal by dragging your finger on the screen and shooting three photos - one straight ahead, one panned left 30 degrees and one panned right 30 degrees?

If I'm understanding correctly, what is the advantage of doing that instead of yawing the drone left and right 30 degrees?

(I'm guessing you have a Mini 3 Pro or Mini 4 Pro. They can pan the gimbal +- 30 degrees. Mavic 3 Pro is limited to 23 degrees.)
By turning the gimbal on it's yaw axis (instead of yawing the drone) the lens is much closer to the NPP (No Parallax Point) meaning you'll get less distortion after stitching. I do this with both my Mavic 2 drones (tap screen, wait for blue circle and then gently drag left or right) and DSLR's (using a macro rail)
 
  • Like
Reactions: Jug's Life
By turning the gimbal on it's yaw axis (instead of yawing the drone) the lens is much closer to the NPP (No Parallax Point) meaning you'll get less distortion after stitching. I do this with both my Mavic 2 drones (tap screen, wait for blue circle and then gently drag left or right) and DSLR's (using a macro rail)
Wow. I just looked at the specs for the Air 2 and it looks like the gimbal can be yawed 75 degrees in each direction. Is that correct?

With the Mavic 3, the range of motion for yawing the gimbal is only 23 degrees each way, so it doesn't allow a very wide panorama with that technique.

Do you see a significant difference in the results yawing the gimbal rather than the drone? Have any samples to share?
 
Last edited:
I was thinking that changing the order from side to side would reduce the distortion.
The order that the images are taken won't have any effect on distortion.
He was talking about the distortion that comes from stitching a spherical image and trying to view it as a flat rectangle.
This makes straight lines curved in the bottom and top of the image, because the top and bottom have to be stretched horizontally.

Here's an example:
Note the effect on the straight road.
 
  • Like
Reactions: maggior
I might be inclined to try a cylindrical projection — you'd get less distortion at the sides (it's quite noticeable on the right side).
Can you link me to how I do that please? I noticed the distortion was very bad. I thought that changing the order of the photos might reduce the distortion.
 
Can you link me to how I do that please?
A cylindrical projection is just one of several different projection types that can be used in creating a stitched panorama.
You select the one you want in your stitching software.
With this program the projection options are in the box at top right.
i-kdxnHNG-XL.jpg


I noticed the distortion was very bad. I thought that changing the order of the photos might reduce the distortion.
I stared at your pano for several minutes but can't work out what "distortion" is being discussed.
I'm not sure that using a cylindrical projection would make any significant difference (or that there's any distortion).

Here I'm showing the difference between a spherical projection ( the most commonly used one) and cylindrical projection (below).
You can see that which one you choose won't make any appreciable difference to any distortion of a vertical edge (if there is any).

i-46kPg8Q-X2.jpg


And no, the order you shoot won't make a shred of difference, but if you mix it up while shooting, you might have trouble getting proper overlaps.
 
  • Like
Reactions: mrfish
Can you link me to how I do that please? I noticed the distortion was very bad. I thought that changing the order of the photos might reduce the distortion.
Changing the order doesn't do anything except increase the change you will miss some coverage and have a gap (or very little overlap).

I don't use Photoshop, but a bit of searching found this tutorial which shows the options when merging. Apparently Adobe calls the projection "layout".


The default projection you used is probably rectilinear, which is best for keeping straight lines straight but gives the 'stretched' look you can see on the tree of the far right edge of your panorama. A cylindrical projection will not have that straight look, and as your scene has no straight lines I think it would look better.

Here is a good summary of the characteristics and trade-offs of different projections (at least, the different projections available in PTGUI).

 
  • Like
Reactions: mrfish
Wow. I just looked at the specs for the Air 2 and it looks like the gimbal can be yawed 75 degrees in each direction. Is that correct?

With the Mavic 3, the range of motion for yawing the gimbal is only 23 degrees each way, so it doesn't allow a very wide panorama with that technique.

Do you see a significant difference in the results yawing the gimbal rather than the drone? Have any samples to share?
Sorry about the late reply.

Yes, there is a significant improvement to be seen in multi-shot linear pano stitches when the you get the lens close to or smack-on the NPP. This is something you can see the effects of more with a DSLR on a tripod, but the principle works exactly the same with the drone camera.
Best way to describe it is as follows.

Mount macro rail to the camera body.
Put camera on tripod (this assumes your camera has the QR plate screw smack-bang in the middle of the body).
At this point, the pivot when you turn the camera left or right is almost in the same plane as the sensor in the camera body.

Walk out about 10 feet directly in front of the tripod and shove a straight stick in the turf. Try to keep in a straight line and walk another 10 feet, now plant another stick in the turf. Return to the tripod and line the viewfinder up so that the first stick is centre frame and hides the second stick behind it.

Now you discover how much the parallax effect screws up your pano's.

Turn the camera on the yaw head so that the first stick is to the extreme left (or right) of the frame. You will see that the second stick is now no longer behind the first stick. Keep your viewfinder at this position.

Using the knurled adjuster on the macro rail, work the camera body backwards so that the pivot point on the tripod lies beneath the LENS body instead of the CAMERA body. As you bring the camera further back from the tripod pivot point, keep watching through the viewfinder -you will see the second stick move until it is hidden behind the first stick.

Now turn the camera so that the first stick occupies the opposite side of the frame. If you have found your camera/lens NPP: wherever you point the camera, far left, centre or far right - you will never see that second stick.... and that means.... no parallax distortion.

Turning the DRONE on it's yaw axis (roughly in the middle of the drones body) is the same as turning the tripod DSLR with the pivot point directly under the sensor.

Turning the drone CAMERA on it's gimbal yaw pivot point means the lens is a hell of a lot closer to the drone cameras natural NPP.

Been shooting simple linear pano's (DSLR) like this for years and I find the results still impress the hell out of me. Add a drone camera into the mix and I end up really chuffed with the finished articles which I edit from TIFF after stitching, output as uncompressed 32bit floating point TIFF they respond almost as well as RAW's to enhancement.
 
Last edited:
  • Like
Reactions: mrfish
Sorry about the late reply.

Yes, there is a significant improvement to be seen in multi-shot linear pano stitches when the you get the lens close to or smack-on the NPP. This is something you can see the effects of more with a DSLR on a tripod, but the principle works exactly the same with the drone camera.
Best way to describe it is as follows.

Mount macro rail to the camera body.
Put camera on tripod (this assumes your camera has the QR plate screw smack-bang in the middle of the body).
At this point, the pivot when you turn the camera left or right is almost in the same plane as the sensor in the camera body.

Walk out about 10 feet directly in front of the tripod and shove a straight stick in the turf. Try to keep in a straight line and walk another 10 feet, now plant another stick in the turf. Return to the tripod and line the viewfinder up so that the first stick is centre frame and hides the second stick behind it.

Now you discover how much the parallax effect screws up your pano's.

Turn the camera on the yaw head so that the first stick is to the extreme left (or right) of the frame. You will see that the second stick is now no longer behind the first stick. Keep your viewfinder at this position.

Using the knurled adjuster on the macro rail, work the camera body backwards so that the pivot point on the tripod lies beneath the LENS body instead of the CAMERA body. As you bring the camera further back from the tripod pivot point, keep watching through the viewfinder -you will see the second stick move until it is hidden behind the first stick.

Now turn the camera so that the first stick occupies the opposite side of the frame. If you have found your camera/lens NPP: wherever you point the camera, far left, centre or far right - you will never see that second stick.... and that means.... no parallax distortion.

Turning the DRONE on it's yaw axis (roughly in the middle of the drones body) is the same as turning the tripod DSLR with the pivot point directly under the sensor.

Turning the drone CAMERA on it's gimbal yaw pivot point means the lens is a hell of a lot closer to the drone cameras natural NPP.

Been shooting simple linear pano's (DSLR) like this for years and I find the results still impress the hell out of me. Add a drone camera into the mix and I end up really chuffed with the finished articles which I edit from TIFF after stitching, output as uncompressed 32bit floating point TIFF they respond almost as well as RAW's to enhancement.

It's a no-fly rainy day, and I found that effect easy to see using a cell phone camera and sighting down the edge of the dining room table. Rotate the phone about it's own vertical axis and there's no observable distortion. But moving the phone with a radius of revolution of six inches or so clearly shows the distortion effect.

The geometry is very different for a drone and distant subjects. I'm curious about any examples anyone has to share.
 
Sorry about the late reply.

Yes, there is a significant improvement to be seen in multi-shot linear pano stitches when the you get the lens close to or smack-on the NPP. This is something you can see the effects of more with a DSLR on a tripod, but the principle works exactly the same with the drone camera.
Best way to describe it is as follows.

Mount macro rail to the camera body.
Put camera on tripod (this assumes your camera has the QR plate screw smack-bang in the middle of the body).
At this point, the pivot when you turn the camera left or right is almost in the same plane as the sensor in the camera body.

Walk out about 10 feet directly in front of the tripod and shove a straight stick in the turf. Try to keep in a straight line and walk another 10 feet, now plant another stick in the turf. Return to the tripod and line the viewfinder up so that the first stick is centre frame and hides the second stick behind it.

Now you discover how much the parallax effect screws up your pano's.

Turn the camera on the yaw head so that the first stick is to the extreme left (or right) of the frame. You will see that the second stick is now no longer behind the first stick. Keep your viewfinder at this position.

Using the knurled adjuster on the macro rail, work the camera body backwards so that the pivot point on the tripod lies beneath the LENS body instead of the CAMERA body. As you bring the camera further back from the tripod pivot point, keep watching through the viewfinder -you will see the second stick move until it is hidden behind the first stick.

Now turn the camera so that the first stick occupies the opposite side of the frame. If you have found your camera/lens NPP: wherever you point the camera, far left, centre or far right - you will never see that second stick.... and that means.... no parallax distortion.

Turning the DRONE on it's yaw axis (roughly in the middle of the drones body) is the same as turning the tripod DSLR with the pivot point directly under the sensor.

Turning the drone CAMERA on it's gimbal yaw pivot point means the lens is a hell of a lot closer to the drone cameras natural NPP.

Been shooting simple linear pano's (DSLR) like this for years and I find the results still impress the hell out of me. Add a drone camera into the mix and I end up really chuffed with the finished articles which I edit from TIFF after stitching, output as uncompressed 32bit floating point TIFF they respond almost as well as RAW's to enhancement.

I think when doing panos of large landscapes that are far away, the parallelax issue you refer to would be either minimal or negligible.
 
  • Like
Reactions: MS Coast and Meta4
Been shooting simple linear pano's (DSLR) like this for years and I find the results still impress the hell out of me. Add a drone camera into the mix and I end up really chuffed with the finished articles which I edit from TIFF after stitching, output as uncompressed 32bit floating point TIFF they respond almost as well as RAW's to enhancement.
How far away is the subject material that this would make any difference at all for drone panos?
 
The geometry is very different for a drone and distant subjects. I'm curious about any examples anyone has to share.
As I noted above, at 120 m you don't notice it.

At 5-10 m above trees I get noticeable parallax error when shooting 360° panoramas. I'm not certain how much of that is from the effect of rotating the drone, and how much is the drone drifting a bit. The effect is less on a windless day, so I'm reasonably certain that at least some of the problem is the drone moving a bit in gusty winds.

Some of the problem is undoubtably tree branches moving, too, but as I've had parallax error in things like houses and steel baseball backstops at least some of the error is coming from the drone. And as I get less error when shooting only one panorama rather than three (at different exposures) the time the drone is hovering is also a factor.
I've seen stitching problems crop up with static built structures in frame @300 yards range and with the horizon line at infinity with the drone body being used as the yaw axis. Both occasions the simple pano's were snapped using the baked-in quick shots (horizontal 180°). In both instances, the original RAW's were used for out of camera stitching. Both occasions conditions were almost as still as a mill pond with wind @+/- 4mph up to 300'.
I suppose the temptation with most people is to fudge the error with the clone tool, but for the people I usually work on behalf of, that's unacceptable - these are of buildings in their historic context (the immediate landscape they occupy).
To be fair: the pano's I'll shoot will always be tight, ranging from 5 to 10 frames with 40-60% horizontal overlap, the widest have been a few 180's and I've never been interested in the full 360° pano's which an INSTA 360 will do a far better job of a lot quicker.
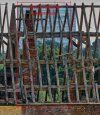
If I get the time today, I'll sort through my hard drive and crop in on one stitched shot of an historic building in the process of 'archaeological disassembly' to illustrate the kind of stitching error I'm going on about. I'll edit this reply and append the JPG crop. The full size original is a little over 1gb and was taken with a tripod static DSLR from about 900' without the lens being at NPP.

**EDIT - to include shots**

How it should have been done in the first place. No parallax errors.
View attachment hi-res pano JPG.jpg

Followed by: Parallax error.
roof timbers hi-res.jpg
Bear in mind - both shots had to be heavily compressed so that they'd upload, so don't expect quality.
The camera was left to settle between each shot in the pano sequence and the shutter triggered remotely so that there was no movement from the tripod. Manual focus used.
 
Last edited:
I've seen stitching problems crop up with static built structures in frame @300 yards range and with the horizon line at infinity with the drone body as the yaw axis. .. Both occasions conditions were almost as still as a mill pond with wind @+/- 4mph up to 300'.
If you've had problems stitching a water horizon, that got nothing at all to do with camera movement and everything to do with the software being unable to find identifiable points to match.
 
@Jug's Life life I will definitely get back to you on this once I get my head round how to fly as I want to know how to do the horizontal pano. It looks like something I would want to print. I get the camera in portrait mode, but I don't know how to pan it.
Learn the device and the terms and the photography will happen. If you are holding a camera and you stand in place but rotate your body in small increments (left or right) and take a shot each time you stop, that is called horizontal panning and if you stand in one spot point the camera low, take a shot, raise the camera up (so the frames overlap which is why he said 30% and that number is arbitrary) take another shot, repeating this process is vertical panning.

On the drone, you would do it the same way for the vertical panning shots BUT he is doing a fancy horizontal shot which is to say he is doing an automatic (preprogrammed) vertical panning shot and then he rotates the drone and does this vertical panning shot again I say preprogrammed because the newer drones have a setting under pano for vertical panos you simply select it and shoot, rotate and then shoot, and repeat as necessary.

If you are a beginning photographer then don't worry about all of it. Learn to fly safely, have fun, and explore new places. Read the manual and read the questions in the forum. People will ask questions that you didn't know you needed to ask...

I have learned a lot by just reading the posts in the forum Good luck and safe flying...
 
Lycus Tech Mavic Air 3 Case

DJI Drone Deals

New Threads

Forum statistics

Threads
131,132
Messages
1,560,150
Members
160,105
Latest member
anton13