- Joined
- Jun 21, 2020
- Messages
- 3,977
- Reactions
- 3,963
The oddest thing happened yesterday after I was finished flying and brought my Mini 3 home for a landing. The homepoint was a driveway with a "pebbled" surface where I have launched and landed many times. I'm not sure if I'd previously flown my Mini 3 from that spot, but I think once or twice. As I brought the Mini 3 in, it hovered above the driveway about a foot, but refused to land. I finally got it down to the ground but the motors wouldn't shut off, even as I pulled both sticks down and in for the emergency shut of move. I thought to take it up again and try once, more, possibly on the grass. As I pushed the left stick forward the Mini 3 didn't go up, but flipped over on its back, where the motors finally stopped, not without severely chipping one of the props. I'm glad that that's all the damage that was done.
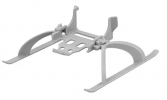
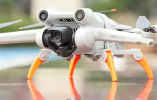
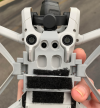
It may be important to say that this was only the second time that I'd installed the "skid" type height extenders (can't call them "leg" extenders any more, can we?). Previously I'd been flying with the strap-on "spider legs" kind with its own legs (photos of each below). I learned a few things about changing props on the Mini 3 which I didn't need to consider with my Mini 1 or Mini 2. I want to share a few things with the forum to consider when changing props to make things easy when it comes to change props on the Mini 3
1) GET A *GOOD* SCREW DRIVER! The one that comes with the Mini 3 is a toy. I was glad I heeded another forum member's warning when he lamented stripping a screw head when changing props. I preemptively bought a good screw driver and lucky to be prepared. The factory installed props are REALLY REALLY tight. I don't know if I would have been able to loosen the screw on the prop that needed replacement without it. Even with the good screw driver it took a LOT of downward pressure to keep the driver seated in the screw slots. Screwdriver for Mini 3 screws

2) Have something handy to rest the arms on when removing or replaceing the screws. Perhaps DJI is using some sort of super-Loc-tite around the screws, but again, it required a ton of downward pressure both to remove the old screw and replace the new one. I used the case for my calipers. About 3/4" inch high or so.
3) Pre-emptively loosen the factory installed screws so it just breaks free and then retighten. Some of them were a bear to break free and I certainly don't want to wrestle with the screws out in the field, especially because the screws on the Mini 3 are tiny- smaller than the screws on the Minis 1 and 2.
4) Familiarize yourself with which props go on which arms. Y'all are probably smarter than me, but I was confused because when I looked at the prop facing up the wrong way the orange marking looked like I had the right prop, but it was wrong. I finally realized that there is a u-shaped mark under one set and none on the other. I think I got it right but haven't test flown my Mini 3 since replacing the props.
If there is anything to take away from these tips is that the factory installed propeller screws come super-tightly screwed in and it wasn't much easier putting a new screw back in. Having the right tools on hand when you need them can avoid a lot of aggrevation. The last thing I wanted was to deal with one or more stripped screw-head slots.
I bought both but from now on will be using the "spider legs" version rather than the "skid" version. I got them in gray, not orange.


It may be important to say that this was only the second time that I'd installed the "skid" type height extenders (can't call them "leg" extenders any more, can we?). Previously I'd been flying with the strap-on "spider legs" kind with its own legs (photos of each below). I learned a few things about changing props on the Mini 3 which I didn't need to consider with my Mini 1 or Mini 2. I want to share a few things with the forum to consider when changing props to make things easy when it comes to change props on the Mini 3
1) GET A *GOOD* SCREW DRIVER! The one that comes with the Mini 3 is a toy. I was glad I heeded another forum member's warning when he lamented stripping a screw head when changing props. I preemptively bought a good screw driver and lucky to be prepared. The factory installed props are REALLY REALLY tight. I don't know if I would have been able to loosen the screw on the prop that needed replacement without it. Even with the good screw driver it took a LOT of downward pressure to keep the driver seated in the screw slots. Screwdriver for Mini 3 screws

2) Have something handy to rest the arms on when removing or replaceing the screws. Perhaps DJI is using some sort of super-Loc-tite around the screws, but again, it required a ton of downward pressure both to remove the old screw and replace the new one. I used the case for my calipers. About 3/4" inch high or so.
3) Pre-emptively loosen the factory installed screws so it just breaks free and then retighten. Some of them were a bear to break free and I certainly don't want to wrestle with the screws out in the field, especially because the screws on the Mini 3 are tiny- smaller than the screws on the Minis 1 and 2.
4) Familiarize yourself with which props go on which arms. Y'all are probably smarter than me, but I was confused because when I looked at the prop facing up the wrong way the orange marking looked like I had the right prop, but it was wrong. I finally realized that there is a u-shaped mark under one set and none on the other. I think I got it right but haven't test flown my Mini 3 since replacing the props.
If there is anything to take away from these tips is that the factory installed propeller screws come super-tightly screwed in and it wasn't much easier putting a new screw back in. Having the right tools on hand when you need them can avoid a lot of aggrevation. The last thing I wanted was to deal with one or more stripped screw-head slots.
I bought both but from now on will be using the "spider legs" version rather than the "skid" version. I got them in gray, not orange.


