DJI Mavic, Air and Mini Drones
Friendly, Helpful & Knowledgeable Community
Join Us Now

360 photo light\dark spots?

Your image looks exactly as the sky should\did. I

As you said, many think you should only use raw..others say otherwise. It's like that all over the place in photography. I went with DNG because after jpg compression there was lots of detail lost when zooming in. The full 178mp stitch photo (vignette aside) had so much more detail further away. But that was a few months ago i last did it, so maybe i'm confusing the auto-generated pano with the detail loss, which is obvious.

Ok i will try that tomorrow with just the jpg.

Thanks a bunch.
 
Badkitty,
This is an interesting thread. I started to thinkt that maybe you might have accidentally checked an option to apply vignetting on your (stitching software which I have never used). I'm looking forward to seeing your attempt with a jpg version.
 
I'm looking forward to seeing your attempt with a jpg version.
It will look like the sky in post #19
I converted several of the dng files to jpg in photoshop which applied the lens correction to fix the vignetting and then I stitched the jpg images.
 
  • Like
Reactions: lilewis
Good news!

I had a similar issue with a 360 deg pano - but for a different reason. Eventually I realized that I had left a Variable ND filter on the camera from a previous flight.
 
As @Meta4 has said, you are misusing the DNG files. Let's look at it like this, you have two main issues:

1. The images are too dark for the 'floor' areas;
2. There is vignetting, causing the light and dark patches in the sky.

I had a go at your photos using my workflow and I think I have made good progress to resolve those issues. See attached.

Workflow:

1. Open DNG files in Adobe Camera RAW - apply edits to sky photos (reduce exposure etc.), 'floor' photos (increase exposure) and those with a bit of sky (find what works best - key thing is to treat all photos in the same 'row' largely the same.
2. In Adobe PhotoShop, go to File > Automate > Lens Correction and run all 26 photos through the process, making sure to tick the box to correct for Vignetting and geometric distortion, and also export to JPG.
3. Open PTGui and load the photos in and stitch them. PTGui will blend the overlapping parts of the photo which may be at different exposures.
4. Load back into Photoshop when done in PTGui and select the black at the top (sky) and use Content Aware Fill to complete the sky.
5. In PhotoShop, go into 360 mode and use the clone stamp to edit out the 'seam' line in the content-aware filled sky.

@Meta4 has said not to use DNG but I don't agree - you can use DNG and still preserve a lot of the information and with the right workflow you can get the best of both worlds.
 

Attachments

  • PANO0001 Panorama 12k.jpg
    7.7 MB · Views: 8
Good news!

I had a similar issue with a 360 deg pano - but for a different reason. Eventually I realized that I had left a Variable ND filter on the camera from a previous flight.
This is also true - for 360 photos you should not use any filters whatsoever as they only increase vignetting to the point whre it can't be corrected by Photoshop.
 
@Meta4 has said not to use DNG but I don't agree - you can use DNG and still preserve a lot of the information and with the right workflow you can get the best of both worlds.
It's fine to use DNG files if you are comfortable with them, but you don't need to feel that you have to.
Another way to deal with this would be to shoot jpg images, using aperture priority to handle the metering (if you have a camera with controllable aperture) and AEB to give multiple shots at different exposure values.
This way you can select the best exposed images for dark and light areas and stitch those.
Here are a couple of examples made this way:
DJI_0259-307a-X3.jpg


DJI_0928-43a-X3.jpg


DJI_0397-475%20detail-X3.jpg
 
I agree that using AEB would be the best solution (you can do this by shooting in Litchi) if you have both the time and inclination to get the perfect shot. I used AEB to produce this image (Google Maps) to ensure the best overall exposure levels for various parts of the 360 image. Of course if anything in your image is moving then the AEB shots may experience ghosting, so some masks may also need to be applied for further improvement of the end result.
 
@Badkitty it looks like you have got a lot more good info about how to solve the pano issues. I usually shoot most of my panos in JPEG because my current drones are both low end. I have also used AEB brackets as suggested above especially in low light. Regardless, good luck with your attempt today. Post your results so we can see if there was any change.

Chris
 
i literally just came inside from taking new shots and , for some reason, i thought the drone wrote both DNG and JPG for each pic taken when doing 360 pano (i had Dng&Jpg on in options) So i just learned it only means the auto generated JPG and then the dng.

Ok so i'll have to sit down and read some of the above better, it does look like this process needs a bit more work...thanks for the info and when i get a great looking pano, i'll post it.

THanks all !
You should end up with 26 DNG (unstitched, totalling c. 1.2 gb) and one JPG (stitched).
 
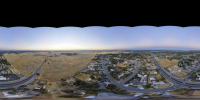
Turned out pretty good..with nothing but running through lens correction in PS and saved as jpg...then PTgui. Looks kind weird without a SUN ...lol...but it's just a test.

Thanks guys ! I'll do some more on making the sky more uniform later, the vignette was the biggest problem.
View attachment 1copy.jpg
 
  • Like
Reactions: Chrislaf
i literally just came inside from taking new shots and , for some reason, i thought the drone wrote both DNG and JPG for each pic taken when doing 360 pano (i had Dng&Jpg on in options) So i just learned it only means the auto generated JPG and then the dng.

Ok so i'll have to sit down and read some of the above better, it does look like this process needs a bit more work...thanks for the info and when i get a great looking pano, i'll post it.

THanks all !
You can shoot manually for a panorama.
It's not hard and gives you a lot more control over what you shoot rather than the same automated 360 every time.
 
Turned out pretty good..with nothing but running through lens correction in PS and saved as jpg...then PTgui. Looks kind weird without a SUN ...lol...but it's just a test.

Thanks guys ! I'll do some more on making the sky more uniform later, the vignette was the biggest problem.
View attachment 132228
If I was you I'd grab the sun from another panorama using the clone stamp, then put it in the sky on your 360 in the appropriate place considering the direction of the shadows. But to be honest that's an 'attention to detail' edit which I'm sure many wouldn't even notice.

Also note that if you do opt to use Litchi to shoot your panoramas, you can actually point the gimbal upwards at a higher angle more than you can by using the DJI Go app. It's not much, but it can make a difference.
 
I can recommend editing the raw files to remove the vignette, export to JPEG, and stitch those. That's what I do anyway, with great results if I may say so myself (Panorama).

Hugin (https://hugin.sf.net) can analyse the photos, figure out their vignetting parameters, and compensate for them.

For a write-up of how I make my spherical panoramas, check Drone Panoramas | dr. Sybren
 
  • Like
Reactions: merak75
PS: I also get the same discolourations with my stitching approach. It's not just regular vignetting, it's in the reddish tint in the sky. I've never seen this before.

1627243492191.png
 
Hello all, new here OBVIOUSLY :D ....i'm been doing video and photos with my MA2 and just started playing with 360 photos. (Been using Gear 360 (both versions) and Insta360 OneX for a bit now)

My problem is the exposure of each pano shot that the drone takes. Doesn't matter where the sun is, over head mid day or sunset, i keep getting photos with light areas right in the middle of each shot, which when stitched looks horrible.

This is in PTGui, it looks like this after stitching as well.

This first screenshot is with AE on.
View attachment 127015


This shot is with AE locked
View attachment 127016

How do i get rid of that light\dark pattern in the middle of each column?
Are you using some king of third party filter in place of the manufacturers U/V filter. If so, that culd be causing the uneven lighting toward the edges. If not, I hope that doesn't happen to my panos.
 
Lycus Tech Mavic Air 3 Case

DJI Drone Deals

New Threads

Forum statistics

Threads
130,984
Messages
1,558,568
Members
159,977
Latest member
JTBennett00