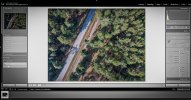
Hello. I have taken some images with my mavic air 2. I shoot in RAW format and when I open the image in windows preview, it looks exactly how it looked when I was taking the picture. The following image is in DNG format.

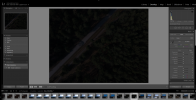
When I put it in lightroom, it automatically get darker for some reason:

Is there any reason? is this normal behaviour?
When I put it in lightroom, it automatically get darker for some reason:
Is there any reason? is this normal behaviour?