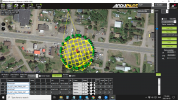
Not really. Just reading over the tutorials on maps made easy dot com.Was there some other video you used to learn how to make the 3D Model in your post #12 above? That too is impressive!
Free accounts are limited to what you can do.
Not really. Just reading over the tutorials on maps made easy dot com.Was there some other video you used to learn how to make the 3D Model in your post #12 above? That too is impressive!

Interesting! I might compile it as an EXE and include it in my release too, on Github. I wanted to update this script for a pretty long time now, and eventually add GUI to it, probably with Kivy, so that will be an update, but for now I will also give the option to use the command line with the script.Hi everyone.
I modify orginal script.
Allow to user script with arguments for process multiple files in batch. Save result to original file folder with original filename and csv extension.
I make pull request to original repository and make my own release.
You can simple drag .waypoints file to exe and that convert to Litchi mission. Result file placces in same folder.
Or you can use it in command line: mp_to_litchi.exe mission.waypoints
You can download it here:
Release mp_to_litchi · VladimirPobedinskiy/MissionPlanner-to-Litchi
If you want, you can install python and use python script.
If you want to compile your own exe file, then you need to install auto-py-to-exe:
Install python and run this in command line:
pip install auto-py-to-exe
You must run cmd as administrator to complete installation.
Next simple run auto-py-to-exe command and web-interface opened. You can select icon for your exe.
For each waypoint there is an action setting where you can take a photo, start or stop recording, etc.I just gave the converter a try and got it into Litchi, but if I'm understanding this correctly, while it is setting an interval distance for every mapping leg, there isn't an action set to "Take Photo". Am I missing something?
Yes, I've done exactly this. After importing it into flylitchi.com, there is no action for any of the waypoints though.Follow the instructions on Github.

GitHub - YarosMallorca/MissionPlanner-to-Litchi: Convert Mission Planner (ArduCopter) Waypoint Missions to Litchi CSV Format to execute on DJI Drones
Convert Mission Planner (ArduCopter) Waypoint Missions to Litchi CSV Format to execute on DJI Drones - YarosMallorca/MissionPlanner-to-Litchigithub.com
- In the Camera Config Tab, Set your camera settings, make sure the FOV values are correct after inputing all camera settings. You can save your camera preset by using the Save button. Also make sure the CAM_TRIGG_DIST is selected!
Yes, I've done exactly this. After importing it into flylitchi.com, there is no action for any of the waypoints though.
Are you talking about the Mission Planner or Litchi Hub?From my limited experience in Mission Planner it defaults to take photos and no other action is required by the end user at least in the ones I have done.
You don't need to set anything additionally in Litchi except what is explained in my README file in GitHubAre you talking about the Mission Planner or Litchi Hub?
Are you saying if there isn't an action set in the Litchi Hub, it defaults to taking photos?

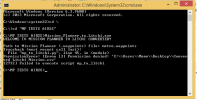
Okay, then it might be because of something related to the version of Windows you're running (from the screenshots I assume it's Windows 8), this script was designed to be used with Windows 10 and above.I get this error, i tried putting both (the .exe and .waypoints) on desktop and does not work at all, i tried several times on several locations always running as administrator, on this screenshot the exe was on c:\MP TESTS AIR2S\ folder and it was trying to write the output on a desktop folder.
 drive.google.com
We use essential cookies to make this site work, and optional cookies to enhance your experience.

