


You are using an out of date browser. It may not display this or other websites correctly.
You should upgrade or use an alternative browser.
You should upgrade or use an alternative browser.
Free training for drone pilots on search/rescue techniques on Mar 30
- Thread starter RCdancer
- Start date
ok.
what do you expect from the state reps?
sorry for the late response...working all day.
3 things:
- publicize us with the appropriate state agencies, i.e., police, fire, rescue, etc. (Give them our contact card which you get at training)
- be willing to train other volunteer pilots in the state
- be the gatekeeper for the state registry - i.e., determine who is qualified to be on the state registry (We will consolidate all the state registries into a national registry.)
Guys, the weather in Huntsville was gorgeous today. I flew the TN river and will post a video soon.
updated list of participants in the free SAR training on Saturday Mar 30 in Mentone AL near Chattanooga TN:
organizer: rcdancer
Robdronesar
FatherXmas
Shane
TR Ganey
crimjohnson (coming from Indianapolis)
SCK
Shoemaker MP (coming from LA.)
M2P-Firefly
terradriller (coming from St Louis)
kf4pzz
Pete Ganey
Mike Stone
JD Trammel
7 spots still available
organizer: rcdancer
Robdronesar
FatherXmas
Shane
TR Ganey
crimjohnson (coming from Indianapolis)
SCK
Shoemaker MP (coming from LA.)
M2P-Firefly
terradriller (coming from St Louis)
kf4pzz
Pete Ganey
Mike Stone
JD Trammel
7 spots still available
Old Aviator
Member
Not in Northern Virginia. We are halfway up the the east coast of Virginia, 1 1/2 hours east of Richmond, on the peninsula that extends into the Chesapeake Bay bounded by the Potomac River to the north and the Rappahannock River to the south.Where in Va is that?

UD-4L
Member
I'm interested in training. I live in northeast Georgia, Gainesville. I was going to wait for the closer meet up in June, but would try to make the 2 hour drive to Mentone if different aspects of the training are covered in each session. RCdancer, what are your thoughts?
I'm interested in training. I live in northeast Georgia, Gainesville. I was going to wait for the closer meet up in June, but would try to make the 2 hour drive to Mentone if different aspects of the training are covered in each session. RCdancer, what are your thoughts?
Yes, different aspects are covered. Not the same training. Worth your time if you want to come. 7 spots are left ... let me know.
Willie14228
Well-Known Member
- Joined
- Jan 21, 2019
- Messages
- 93
- Reactions
- 72
Might be able to use python to parse the information over to the CSV file if you want to pm me and I will give you my phone number and email maybe we can put our heads together and see what we can come up withI'd be perfectly happy to give it away, but it currently runs in a somewhat esoteric programming language that is part of the scientific data analysis package that I use. I can port the waypoint generation part to Excel or similar, but automatic generation of the CSV file that Litchi imports is trickier. I was pretty sure that someone else must have written a more user-friendly application, but I haven't found one.
Might be able to use python to parse the information over to the CSV file if you want to pm me and I will give you my phone number and email maybe we can put our heads together and see what we can come up with
The code generating the grid is almost completely trivial, but I still don't have it working in Excel - primarily because of the dynamic number of waypoints. I haven't put much work into that though. The Igor Pro programming language is fairly transparent so if you are interested - this is the main function, with inputs defining start point, grid bearing, width and length, height AGL, grid pitch and interval, handedness and speed, which in Igor are via a GUI. It creates a fully-specified CSV that imports directly into Litchi as a complete mission.
Function createGrid()
Variable /G lat0, long0, heading, length, width, dl, dw, turn, alt, speed // turn: 1 - grid goes rigth, -1 - grid goes left
Variable /G theta, points
variable /G radius = 6371e3 // Mean earth radius in meters
Int nl, nw, nt, i, j, pt
KillWindow /Z Output_m
KillWindow /Z Output_deg
KillWindow /Z Output
KillWaves/A/Z
nl = ceil(length/dl) + 1 // number of points lengthwise
nw = ceil(width/dw) + 1 // number of points widthwise
nt = nl * nw + 1
points = nt
Make /O /N=(nt) mE, mN, lat, long, latitude,longitude,'altitude(m)','heading(deg)','curvesize(m)',rotationdir,gimbalmode,gimbalpitchangle,actiontype1,actionparam1,actiontype2,actionparam2
Make /O /N=(nt) actiontype3,actionparam3,actiontype4,actionparam4,actiontype5,actionparam5,actiontype6,actionparam6,actiontype7,actionparam7,actiontype8,actionparam8,actiontype9,actionparam9
Make /O /N=(nt) actiontype10,actionparam10,actiontype11,actionparam11,actiontype12,actionparam12,actiontype13,actionparam13,actiontype14,actionparam14,actiontype15,actionparam15,altitudemode
Make /O /N=(nt) 'speed(m/s)',poi_latitude,poi_longitude,'poi_altitude(m)',poi_altitudemode
'altitude(m)' = alt
'heading(deg)' = heading
'curvesize(m)' = 0
rotationdir = 0
gimbalmode = 0
gimbalpitchangle = 0
actiontype1 = -1 // 1 = take photo, -1 = no photo
actionparam1 = 0
actiontype2 = -1
actionparam2 = 0
actiontype3 = -1
actionparam3 = 0
actiontype4 = -1
actionparam4 = 0
actiontype5 = -1
actionparam5 = 0
actiontype6 = -1
actiontype7 = -1
actionparam7 = 0
actiontype8 = -1
actionparam8 = 0
actiontype9 = -1
actionparam9 = 0
actiontype10 = -1
actionparam10 = 0
actiontype11 = -1
actionparam11 = 0
actiontype12 = -1
actionparam12 = 0
actiontype13 = -1
actionparam13 = 0
actiontype14 = -1
actionparam14 = 0
actiontype15 = -1
actionparam15 = 0
altitudemode = 1
'speed(m/s)' = speed
poi_latitude = 0
poi_longitude = 0
poi_longitude = 0
'poi_altitude(m)' = 0
poi_altitudemode = 0
theta = heading*pi/180
// First waypoint offset by 100 m and is intended to be moved to
// the launch point before starting the mission in order to set the
// altitude reference.
mE[0] = 0 - 100*(sin(theta)/2 + sin(theta + turn*pi/2)/2)
mN[0] = 0 - 100*(cos(theta)/2 + cos(theta + turn*pi/2)/2)
mE[1] = 0
mN[1] = 0
i = 3 // waypoint number
j = 1 // length index
do // i loop
j = 1
do // j loop forwards
mE[i-1] = mE[i-2] + dl*sin(theta)
mN[i-1] = mN[i-2] + dl*cos(theta)
i += 1
j += 1
while (j < nl)
if (i < nt)
mE[i-1] = mE[i-2] + dw*sin(theta + turn*pi/2)
mN[i-1] = mN[i-2] + dw*cos(theta + turn*pi/2)
i += 1
endif
j = 1
if (i < nt)
do // j loop backwards
mE[i-1] = mE[i-2] - dl*sin(theta)
mN[i-1] = mN[i-2] - dl*cos(theta)
i += 1
j += 1
while (j < nl)
endif
if (i < nt)
mE[i-1] = mE[i-2] + dw*sin(theta + turn*pi/2)
mN[i-1] = mN[i-2] + dw*cos(theta + turn*pi/2)
i += 1
endif
while (i < nt)
lat[0] = lat0*pi/180 + (mN[0])/radius
long[0] = long0*pi/180 + (mE[0])/(radius*cos(lat[0]))
pt = 1
do
lat[pt] = lat[pt-1] + (mN[pt] - mN[pt-1])/radius
long[pt] = long[pt-1] + (mE[pt] - mE[pt-1])/(radius*cos(lat[pt]))
pt += 1
while (pt < nt)
latitude = lat*180/pi
longitude = long*180/pi
Execute "Output()"
Execute "Output_m()"
Execute "Output_deg()"
savetablecopy /T=2 /W = Output
End
An example resulting grid for a 500 m x 500 m left box at 312° at looks like this:
Or in lat/long:

The csv outputs as: cañada_bonita.txt
And the final grid looks like this:

Attachments
The code generating the grid is almost completely trivial, but I still don't have it working in Excel - primarily because of the dynamic number of waypoints. I haven't put much work into that though. The Igor Pro programming language is fairly transparent so if you are interested - this is the main function, with inputs defining start point, grid bearing, width and length, height AGL, grid pitch and interval, handedness and speed, which in Igor are via a GUI. It creates a fully-specified CSV that imports directly into Litchi as a complete mission.
Function createGrid()Variable /G lat0, long0, heading, length, width, dl, dw, turn, alt, speed // turn: 1 - grid goes rigth, -1 - grid goes leftVariable /G theta, pointsvariable /G radius = 6371e3 // Mean earth radius in metersInt nl, nw, nt, i, j, ptKillWindow /Z Output_mKillWindow /Z Output_degKillWindow /Z OutputKillWaves/A/Znl = ceil(length/dl) + 1 // number of points lengthwisenw = ceil(width/dw) + 1 // number of points widthwisent = nl * nw + 1points = ntMake /O /N=(nt) mE, mN, lat, long, latitude,longitude,'altitude(m)','heading(deg)','curvesize(m)',rotationdir,gimbalmode,gimbalpitchangle,actiontype1,actionparam1,actiontype2,actionparam2Make /O /N=(nt) actiontype3,actionparam3,actiontype4,actionparam4,actiontype5,actionparam5,actiontype6,actionparam6,actiontype7,actionparam7,actiontype8,actionparam8,actiontype9,actionparam9Make /O /N=(nt) actiontype10,actionparam10,actiontype11,actionparam11,actiontype12,actionparam12,actiontype13,actionparam13,actiontype14,actionparam14,actiontype15,actionparam15,altitudemodeMake /O /N=(nt) 'speed(m/s)',poi_latitude,poi_longitude,'poi_altitude(m)',poi_altitudemode'altitude(m)' = alt'heading(deg)' = heading'curvesize(m)' = 0rotationdir = 0gimbalmode = 0gimbalpitchangle = 0actiontype1 = -1 // 1 = take photo, -1 = no photoactionparam1 = 0actiontype2 = -1actionparam2 = 0actiontype3 = -1actionparam3 = 0actiontype4 = -1actionparam4 = 0actiontype5 = -1actionparam5 = 0actiontype6 = -1actiontype7 = -1actionparam7 = 0actiontype8 = -1actionparam8 = 0actiontype9 = -1actionparam9 = 0actiontype10 = -1actionparam10 = 0actiontype11 = -1actionparam11 = 0actiontype12 = -1actionparam12 = 0actiontype13 = -1actionparam13 = 0actiontype14 = -1actionparam14 = 0actiontype15 = -1actionparam15 = 0altitudemode = 1'speed(m/s)' = speedpoi_latitude = 0poi_longitude = 0poi_longitude = 0'poi_altitude(m)' = 0poi_altitudemode = 0theta = heading*pi/180// First waypoint offset by 100 m and is intended to be moved to // the launch point before starting the mission in order to set the// altitude reference.mE[0] = 0 - 100*(sin(theta)/2 + sin(theta + turn*pi/2)/2)mN[0] = 0 - 100*(cos(theta)/2 + cos(theta + turn*pi/2)/2)mE[1] = 0 mN[1] = 0i = 3 // waypoint numberj = 1 // length indexdo // i loopj = 1do // j loop forwardsmE[i-1] = mE[i-2] + dl*sin(theta)mN[i-1] = mN[i-2] + dl*cos(theta)i += 1j += 1while (j < nl)if (i < nt)mE[i-1] = mE[i-2] + dw*sin(theta + turn*pi/2)mN[i-1] = mN[i-2] + dw*cos(theta + turn*pi/2)i += 1endifj = 1if (i < nt)do // j loop backwardsmE[i-1] = mE[i-2] - dl*sin(theta)mN[i-1] = mN[i-2] - dl*cos(theta)i += 1j += 1while (j < nl)endifif (i < nt)mE[i-1] = mE[i-2] + dw*sin(theta + turn*pi/2)mN[i-1] = mN[i-2] + dw*cos(theta + turn*pi/2)i += 1endifwhile (i < nt)lat[0] = lat0*pi/180 + (mN[0])/radiuslong[0] = long0*pi/180 + (mE[0])/(radius*cos(lat[0]))pt = 1dolat[pt] = lat[pt-1] + (mN[pt] - mN[pt-1])/radiuslong[pt] = long[pt-1] + (mE[pt] - mE[pt-1])/(radius*cos(lat[pt]))pt += 1while (pt < nt)latitude = lat*180/pilongitude = long*180/piExecute "Output()"Execute "Output_m()"Execute "Output_deg()"savetablecopy /T=2 /W = OutputEndAn example resulting grid for a 500 m x 500 m left box at 312° at looks like this:
View attachment 61984
Or in lat/long:
View attachment 61985
The csv outputs as: cañada_bonita.txt
And the final grid looks like this:
View attachment 61987
Thanks much for sharing the fruit of your labor. It's people like you that make the world a brighter place. I took a brief look at the code (nice job!) and think it can ultimately be made compatible with Excel. Wish you were closer; I'd love to get together with you in person - we lived 4 years in El Paso. Stark beauty of the high desert ... and perfect terrain for drone SAR ops.

I don't have time right now to dive into it with the full-time job, the competitive ballroom dancing, working on the SAR intro brief, planning the online training modules, and coordinating with Rob and Charlie on the upcoming training on Mar 30 (and oh yeah - exploring new SAR drone techniques when the weather is nice.)
I'll put it in the que but can't guarantee when I'll get to it. thanks again
Last edited:
Former Member
Well-Known Member
Nice work. Can I ask you a few quick questions?The code generating the grid is almost completely trivial, but I still don't have it working in Excel - primarily because of the dynamic number of waypoints. I haven't put much work into that though. The Igor Pro programming language is fairly transparent so if you are interested - this is the main function, with inputs defining start point, grid bearing, width and length, height AGL, grid pitch and interval, handedness and speed, which in Igor are via a GUI. It creates a fully-specified CSV that imports directly into Litchi as a complete mission.
Function createGrid()Variable /G lat0, long0, heading, length, width, dl, dw, turn, alt, speed // turn: 1 - grid goes rigth, -1 - grid goes leftVariable /G theta, pointsvariable /G radius = 6371e3 // Mean earth radius in metersInt nl, nw, nt, i, j, ptKillWindow /Z Output_mKillWindow /Z Output_degKillWindow /Z OutputKillWaves/A/Znl = ceil(length/dl) + 1 // number of points lengthwisenw = ceil(width/dw) + 1 // number of points widthwisent = nl * nw + 1points = ntMake /O /N=(nt) mE, mN, lat, long, latitude,longitude,'altitude(m)','heading(deg)','curvesize(m)',rotationdir,gimbalmode,gimbalpitchangle,actiontype1,actionparam1,actiontype2,actionparam2Make /O /N=(nt) actiontype3,actionparam3,actiontype4,actionparam4,actiontype5,actionparam5,actiontype6,actionparam6,actiontype7,actionparam7,actiontype8,actionparam8,actiontype9,actionparam9Make /O /N=(nt) actiontype10,actionparam10,actiontype11,actionparam11,actiontype12,actionparam12,actiontype13,actionparam13,actiontype14,actionparam14,actiontype15,actionparam15,altitudemodeMake /O /N=(nt) 'speed(m/s)',poi_latitude,poi_longitude,'poi_altitude(m)',poi_altitudemode'altitude(m)' = alt'heading(deg)' = heading'curvesize(m)' = 0rotationdir = 0gimbalmode = 0gimbalpitchangle = 0actiontype1 = -1 // 1 = take photo, -1 = no photoactionparam1 = 0actiontype2 = -1actionparam2 = 0actiontype3 = -1actionparam3 = 0actiontype4 = -1actionparam4 = 0actiontype5 = -1actionparam5 = 0actiontype6 = -1actiontype7 = -1actionparam7 = 0actiontype8 = -1actionparam8 = 0actiontype9 = -1actionparam9 = 0actiontype10 = -1actionparam10 = 0actiontype11 = -1actionparam11 = 0actiontype12 = -1actionparam12 = 0actiontype13 = -1actionparam13 = 0actiontype14 = -1actionparam14 = 0actiontype15 = -1actionparam15 = 0altitudemode = 1'speed(m/s)' = speedpoi_latitude = 0poi_longitude = 0poi_longitude = 0'poi_altitude(m)' = 0poi_altitudemode = 0theta = heading*pi/180// First waypoint offset by 100 m and is intended to be moved to // the launch point before starting the mission in order to set the// altitude reference.mE[0] = 0 - 100*(sin(theta)/2 + sin(theta + turn*pi/2)/2)mN[0] = 0 - 100*(cos(theta)/2 + cos(theta + turn*pi/2)/2)mE[1] = 0 mN[1] = 0i = 3 // waypoint numberj = 1 // length indexdo // i loopj = 1do // j loop forwardsmE[i-1] = mE[i-2] + dl*sin(theta)mN[i-1] = mN[i-2] + dl*cos(theta)i += 1j += 1while (j < nl)if (i < nt)mE[i-1] = mE[i-2] + dw*sin(theta + turn*pi/2)mN[i-1] = mN[i-2] + dw*cos(theta + turn*pi/2)i += 1endifj = 1if (i < nt)do // j loop backwardsmE[i-1] = mE[i-2] - dl*sin(theta)mN[i-1] = mN[i-2] - dl*cos(theta)i += 1j += 1while (j < nl)endifif (i < nt)mE[i-1] = mE[i-2] + dw*sin(theta + turn*pi/2)mN[i-1] = mN[i-2] + dw*cos(theta + turn*pi/2)i += 1endifwhile (i < nt)lat[0] = lat0*pi/180 + (mN[0])/radiuslong[0] = long0*pi/180 + (mE[0])/(radius*cos(lat[0]))pt = 1dolat[pt] = lat[pt-1] + (mN[pt] - mN[pt-1])/radiuslong[pt] = long[pt-1] + (mE[pt] - mE[pt-1])/(radius*cos(lat[pt]))pt += 1while (pt < nt)latitude = lat*180/pilongitude = long*180/piExecute "Output()"Execute "Output_m()"Execute "Output_deg()"savetablecopy /T=2 /W = OutputEndAn example resulting grid for a 500 m x 500 m left box at 312° at looks like this:
View attachment 61984
Or in lat/long:
View attachment 61985
The csv outputs as: cañada_bonita.txt
And the final grid looks like this:
View attachment 61987
I see that your terrain starts at a higher elevation and then the last waypoint is at a lower elevation. Do you pre fly this plan and then set the way points? Litchi is a great app however it's dumb when it comes to knowing it's AGL. Doesn't it use the starting ground elevation as 0? How can a pilot take that into consideration when flying a mission?
Do you think it's a good idea to fly a cross hatch pattern? I have set a few missions up to do ovular legs such as yours but then I go over the mission again like a checker board.
FYI for everyone that is coming to training on Mar 30 ....
We're ultimately looking for DSAR volunteer state representatives for every state. So far, we have two states covered - me for Alabama, and robdronesar for Georgia (although he doesn't know it yet.") FatheXmas also will have the jacket as a cofounder for DSAR.) So far, I believe we have people coming from LA, MO and IN scheduled to come to training.
FatheXmas also will have the jacket as a cofounder for DSAR.) So far, I believe we have people coming from LA, MO and IN scheduled to come to training.
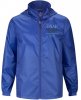
Only DSAR state reps will have the opportunity to purchase this cool windbreaker jacket for $50. It would be the only jacket of it's kind in the state. (Any 107 pilot who engages in a real-world SAR op can also order the jacket - the one and only exception.)
To be a state rep and buy a windbreaker, one must:
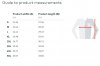
If you are coming to training on Mar 30, and you're already 107 certified or will be by Mar 30, and want to volunteer to become the DSAR state rep (we currently need every state except AL & GA) AND want to buy a jacket .... let me know and send me your size. I will order the jacket and you can pay for it when you get on Mar 30. The jacket is100% polyester, 190T with water resistant coating and water repellent finish and features a roll-away hood with easy-grip zipper pull. Size chart is below. It's not Arcteryx quality, but you'll be rocking with the cool embroidered logo.
We're ultimately looking for DSAR volunteer state representatives for every state. So far, we have two states covered - me for Alabama, and robdronesar for Georgia (although he doesn't know it yet.
FatheXmas also will have the jacket as a cofounder for DSAR.) So far, I believe we have people coming from LA, MO and IN scheduled to come to training.Only DSAR state reps will have the opportunity to purchase this cool windbreaker jacket for $50. It would be the only jacket of it's kind in the state. (Any 107 pilot who engages in a real-world SAR op can also order the jacket - the one and only exception.)
To be a state rep and buy a windbreaker, one must:
- be 107 certified
- take SAR training and keep improving your skills
- volunteer to serve as the state representative for DSAR (be the voice and face of us to the state)
- publicize us with the appropriate state agencies, i.e., police, fire, rescue, etc. (i.e., it's easy - Give them our contact card which you will get at training)
- be willing to help train other volunteer pilots in the state
- be the gatekeeper for the state registry - i.e., determine who is qualified to be on the state registry. Only 107 pilots who have SAR training and are willing to volunteer will be on the registry. (We will consolidate all the state registries into a national registry.)
If you are coming to training on Mar 30, and you're already 107 certified or will be by Mar 30, and want to volunteer to become the DSAR state rep (we currently need every state except AL & GA) AND want to buy a jacket .... let me know and send me your size. I will order the jacket and you can pay for it when you get on Mar 30. The jacket is100% polyester, 190T with water resistant coating and water repellent finish and features a roll-away hood with easy-grip zipper pull. Size chart is below. It's not Arcteryx quality, but you'll be rocking with the cool embroidered logo.
Attachments


Nice work. Can I ask you a few quick questions?
I see that your terrain starts at a higher elevation and then the last waypoint is at a lower elevation. Do you pre fly this plan and then set the way points? Litchi is a great app however it's dumb when it comes to knowing it's AGL. Doesn't it use the starting ground elevation as 0? How can a pilot take that into consideration when flying a mission?
Contouring is the most efficient pattern, energy wise. Whether you start at the higher or lower end of the pattern doesn't matter, and nor does starting at the near or far point of the grid (from the home point), but starting at the far point is less likely to trigger smart RTH.
I figure out the basic parameters on Google Earth based on that - i.e. grid start point, orientation etc. There is no need to fly it first at all.
The altitude issue is important, which is why there is one extra waypoint before the grid starts. That needs to be moved before takeoff to the takeoff location (home point) because, when using AGL definitions for waypoints, Litchi assumes that takeoff is at the first waypoint ground elevation and defines all subsequent waypoint heights relative to that.
Note that this procedure doesn't need a DEM, because Litchi Mission Hub makes the necessary height adjustments automatically when it imports the csv.
In the example grid that I showed, which is on the side of a valley starting at the top, you could not launch from the base with the first waypoint where it is shown - you need to drag the first waypoint down to the launch location. That then references ground level for the flight. If you move the first, spare waypoint down to the trail in the valley in Mission Hub or the app (easier to watch in Mission Hub) you will see Litchi adjust all the waypoints to make them correct for that launch point.
Do you think it's a good idea to fly a cross hatch pattern? I have set a few missions up to do ovular legs such as yours but then I go over the mission again like a checker board.
I'm not quite sure what you mean. That pattern is the most efficient coverage route and gives full overlapping coverage.
Do you think it's a good idea to fly a cross hatch pattern? I have set a few missions up to do ovular legs such as yours but then I go over the mission again like a checker board.
My opinion is that the search pattern is dependent upon terrain, weather, how big the search area is and what you're looking for. No doubt a cross hatch pattern would be sometimes be appropriate. In other situations, probably a sweeping, overlapping search pattern like he's got. At other times (i.e., a lost car or group of people), perhaps waypoints with POIs. Experience will dictate what kind of search pattern you use. That's why practice is so important. Almost every time I fly - even if just for fun - I'm experimenting with potential new SAR techniques.
One other rather obvious comment - for a grid size of this kind (500 m x 500 m) which is about right for one battery, VLOS is an issue. You could launch from the middle of the grid and probably maintain VLOS but, especially for multiple grids it is certainly easier if you have a VLOS waiver in place - then you can launch and let the mission run autonomously without worrying so much about VLOS or control link. That worked very well for a set of six grids that I used to search around 2 km² recently - all flown from the ICP with a maximum distance of around 1.5 km.
starting at the far point is less likely to trigger smart RTH.
An excellent point that I need to emphasize in the intro brief.
Similar threads
- Replies
- 10
- Views
- 1K
- Replies
- 14
- Views
- 2K
- Replies
- 0
- Views
- 1K
- Replies
- 19
- Views
- 4K


DJI Drone Deals
New Threads
-

-
 4 Pro The Tanana Valley inversion layer. What is it?
- Started by akdrone
- Replies: 1
-
-
Possible to fix free panorama boundaries for multiple shots?
- Started by MS Coast
- Replies: 4
-
Mavic communication failure, scan stuck at 20%, suspected mainboard failure (any similar cases?)
- Started by SantiAli98
- Replies: 2
Members online
Total: 5,299 (members: 11, guests: 5,288)
Forum statistics
